Motorcycle Modifications
Rule #1 — Keep It Factory, Keep It Simple.
My first rule is straightforward: whatever I change on a motorcycle must be reversible. I don’t cut or drill the chassis, I don’t modify the primary wiring harness, and I try to keep the outward appearance as close to factory as possible. That’s just how I like to treat my bikes — I have a lot of mechanical sympathy, and I prefer not to butcher anything. In Australia, the changes I make require an ADR exemption (ADR 57, which deals with control locations). Beyond that, my goal is always the same: keep it factory, keep it simple, and keep it reversible.
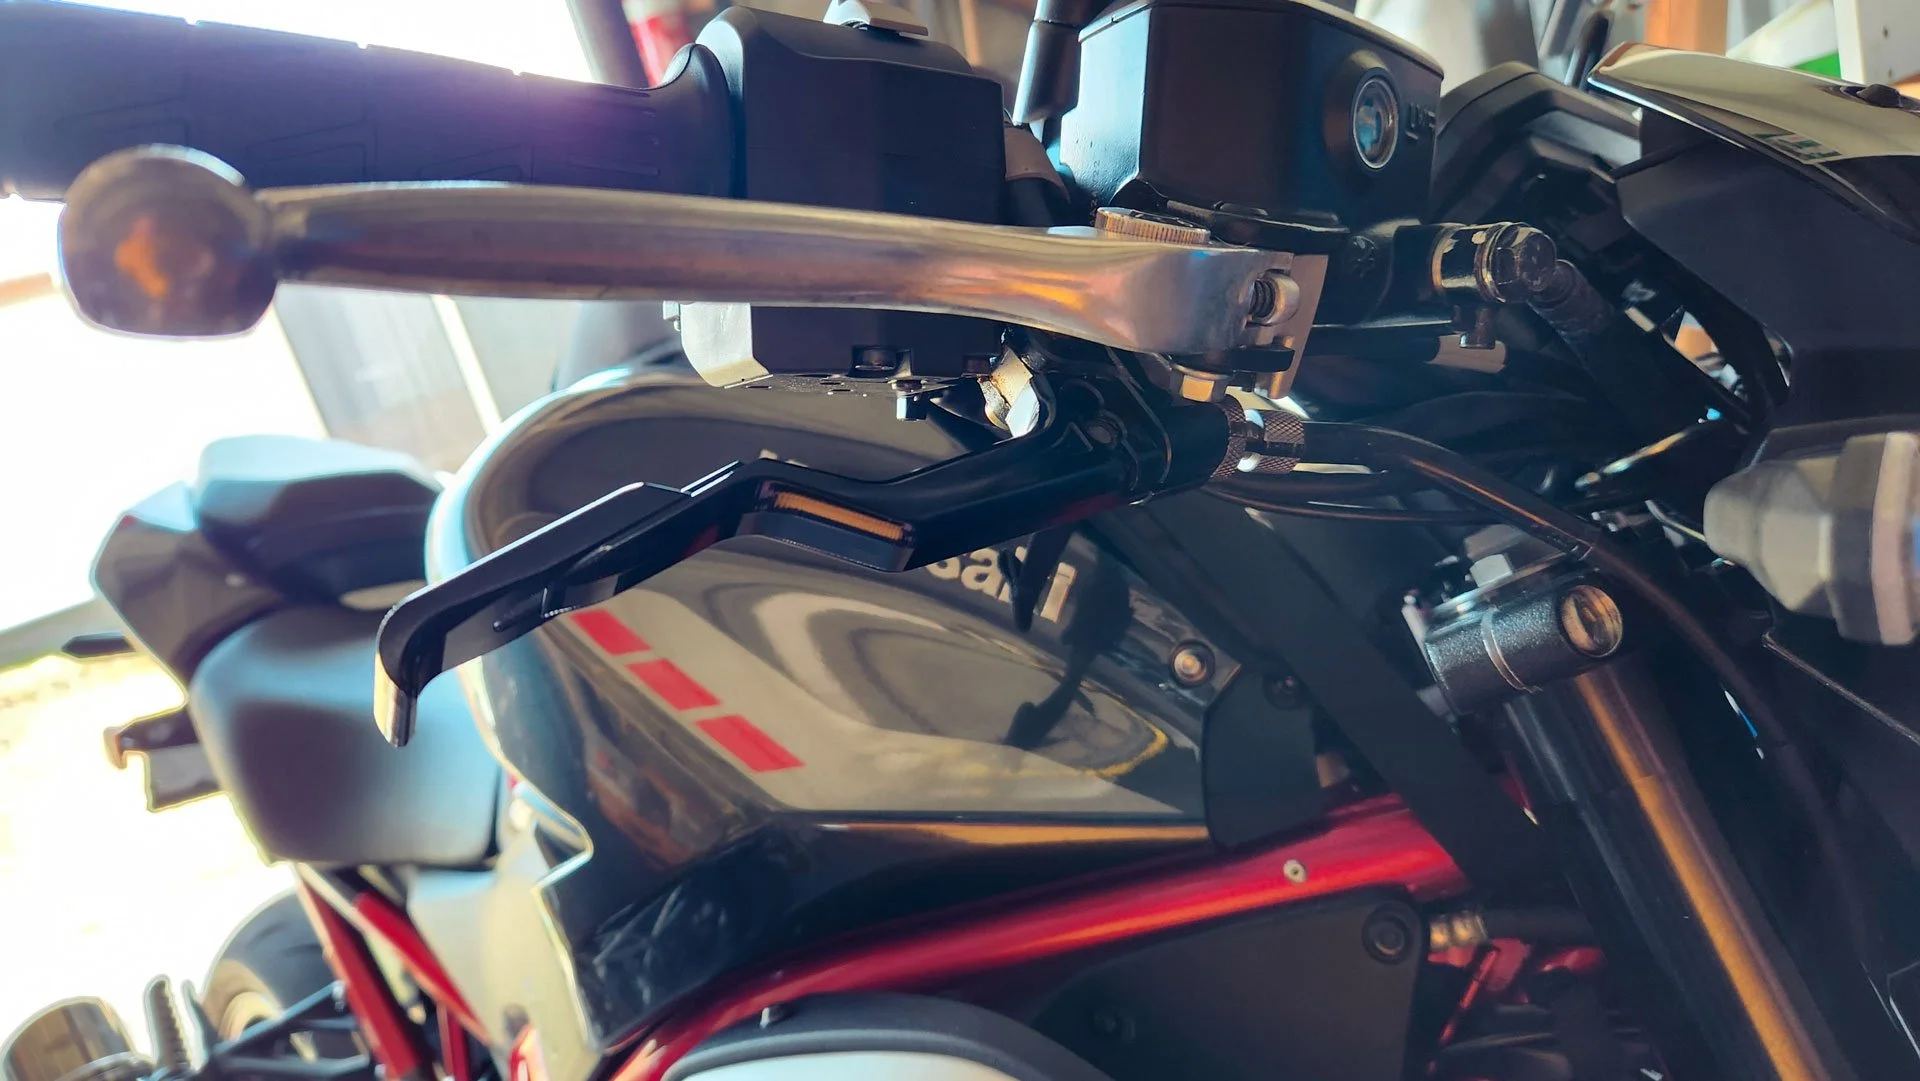
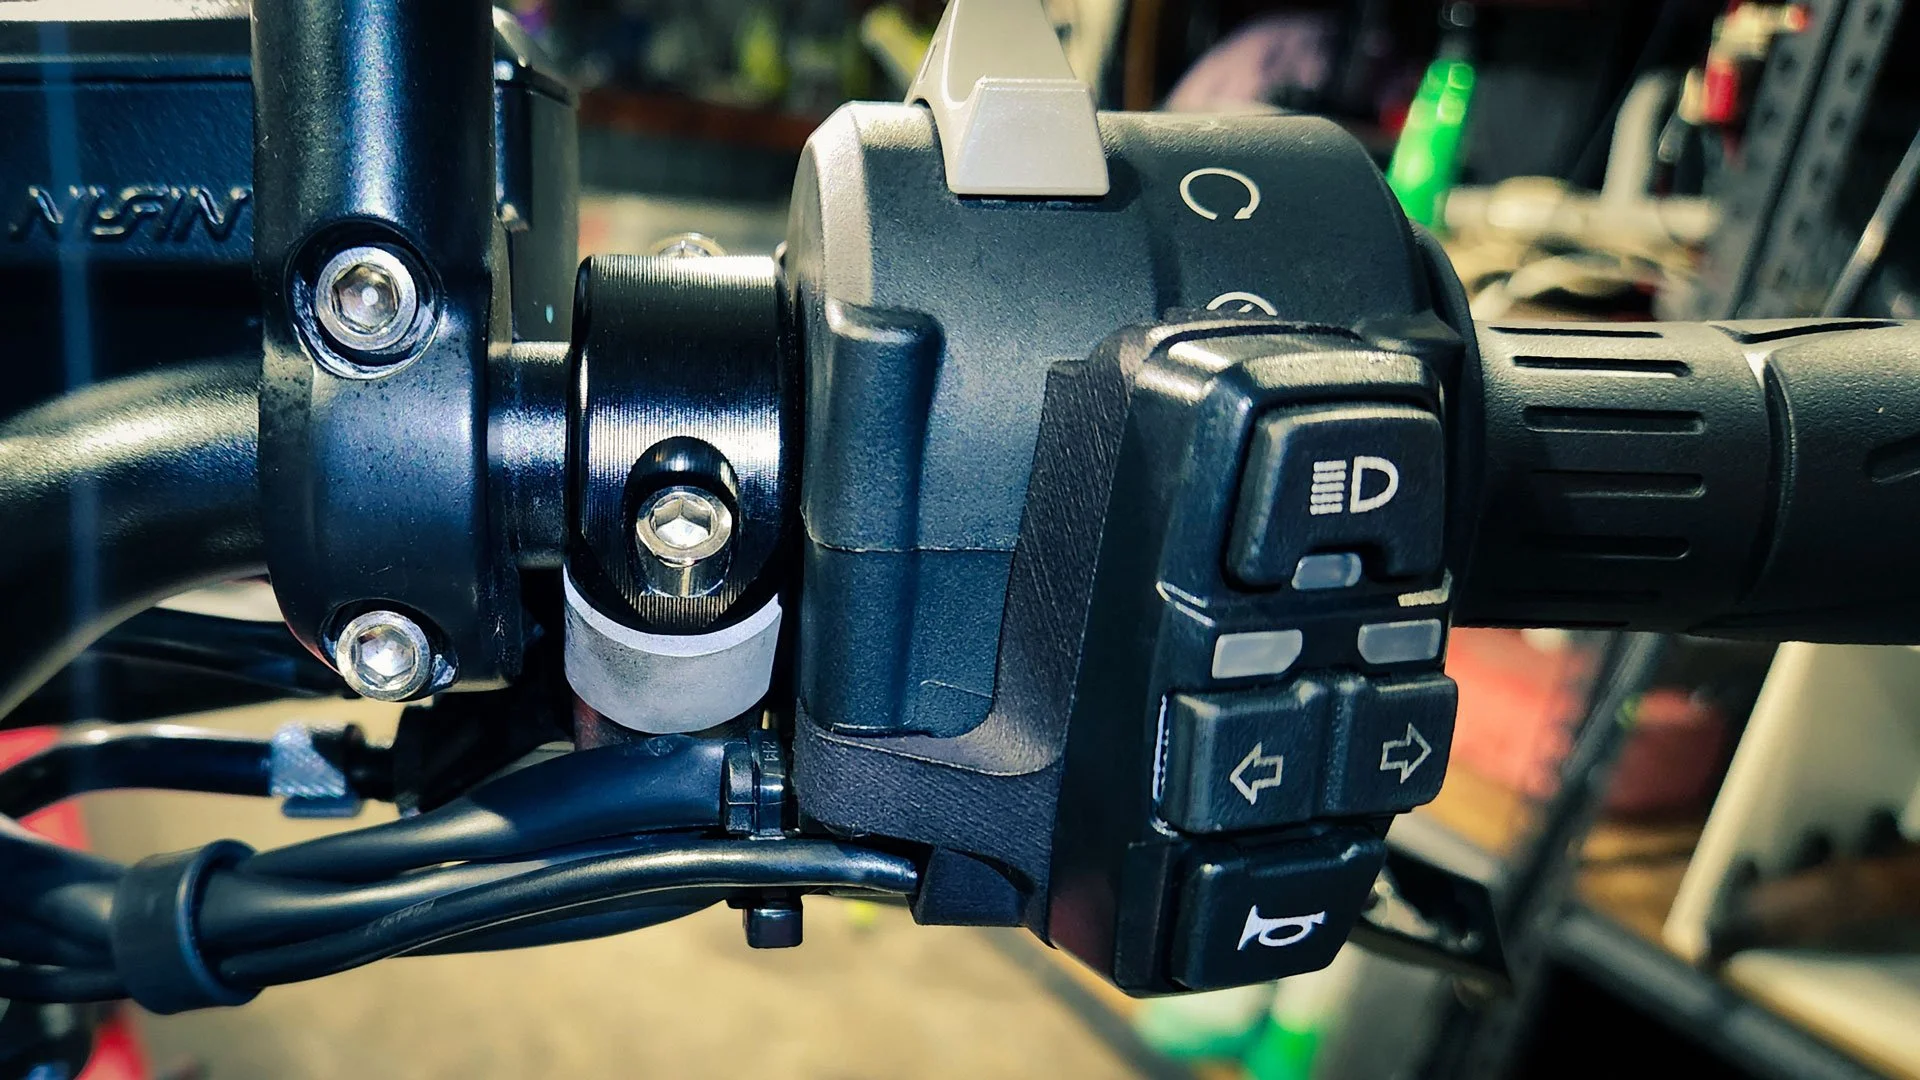
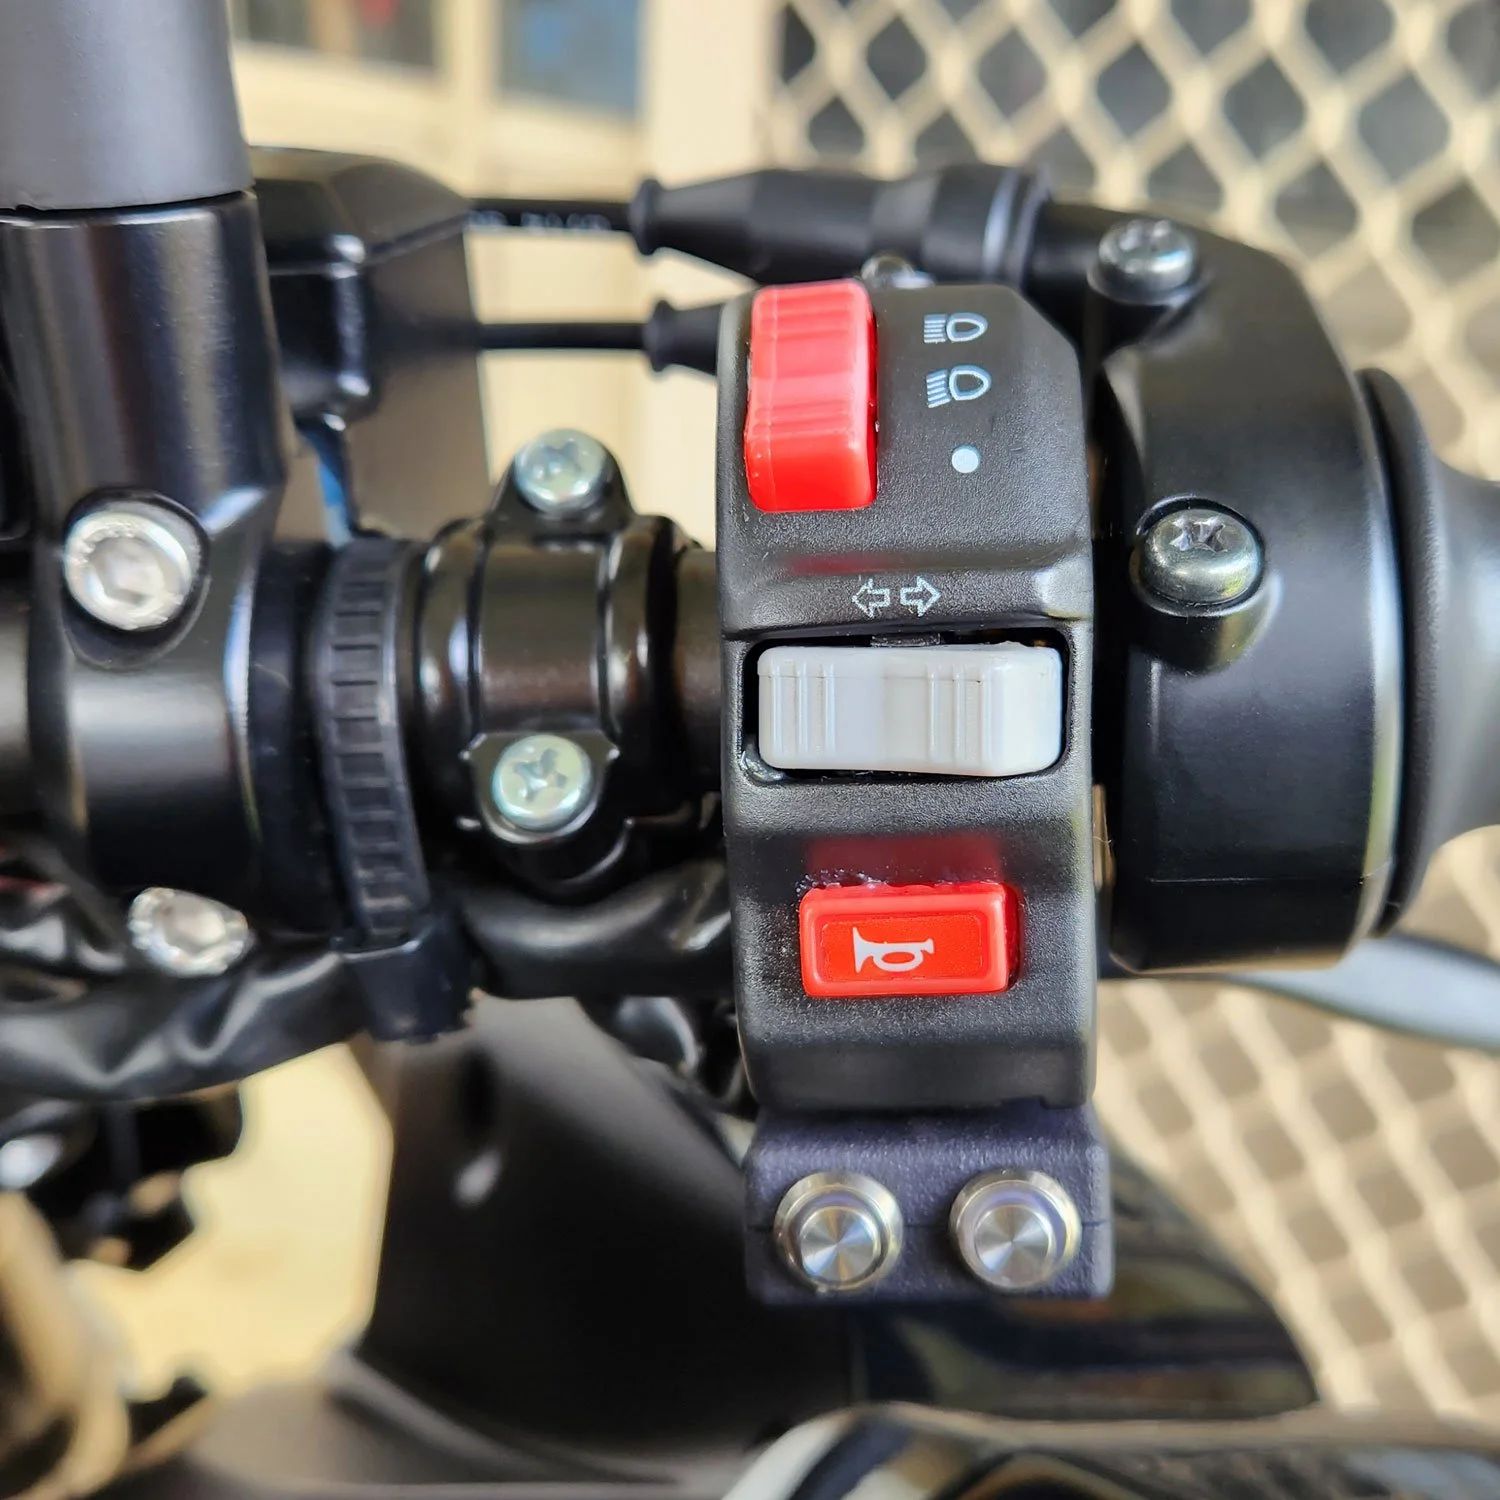
For my bikes, the modifications usually involve: • relocating the indicator, horn, and high/low beam switches • moving the clutch lever to the right‑hand side (I run it under the brake lever — that’s what feels natural to me) • dealing with the front brake light switch clearance once the clutch lever moves • finding a way to keep the clutch switch functional without interfering with the bike’s systems These aren’t instructions — just the things I’ve needed to address on the bikes I’ve owned.
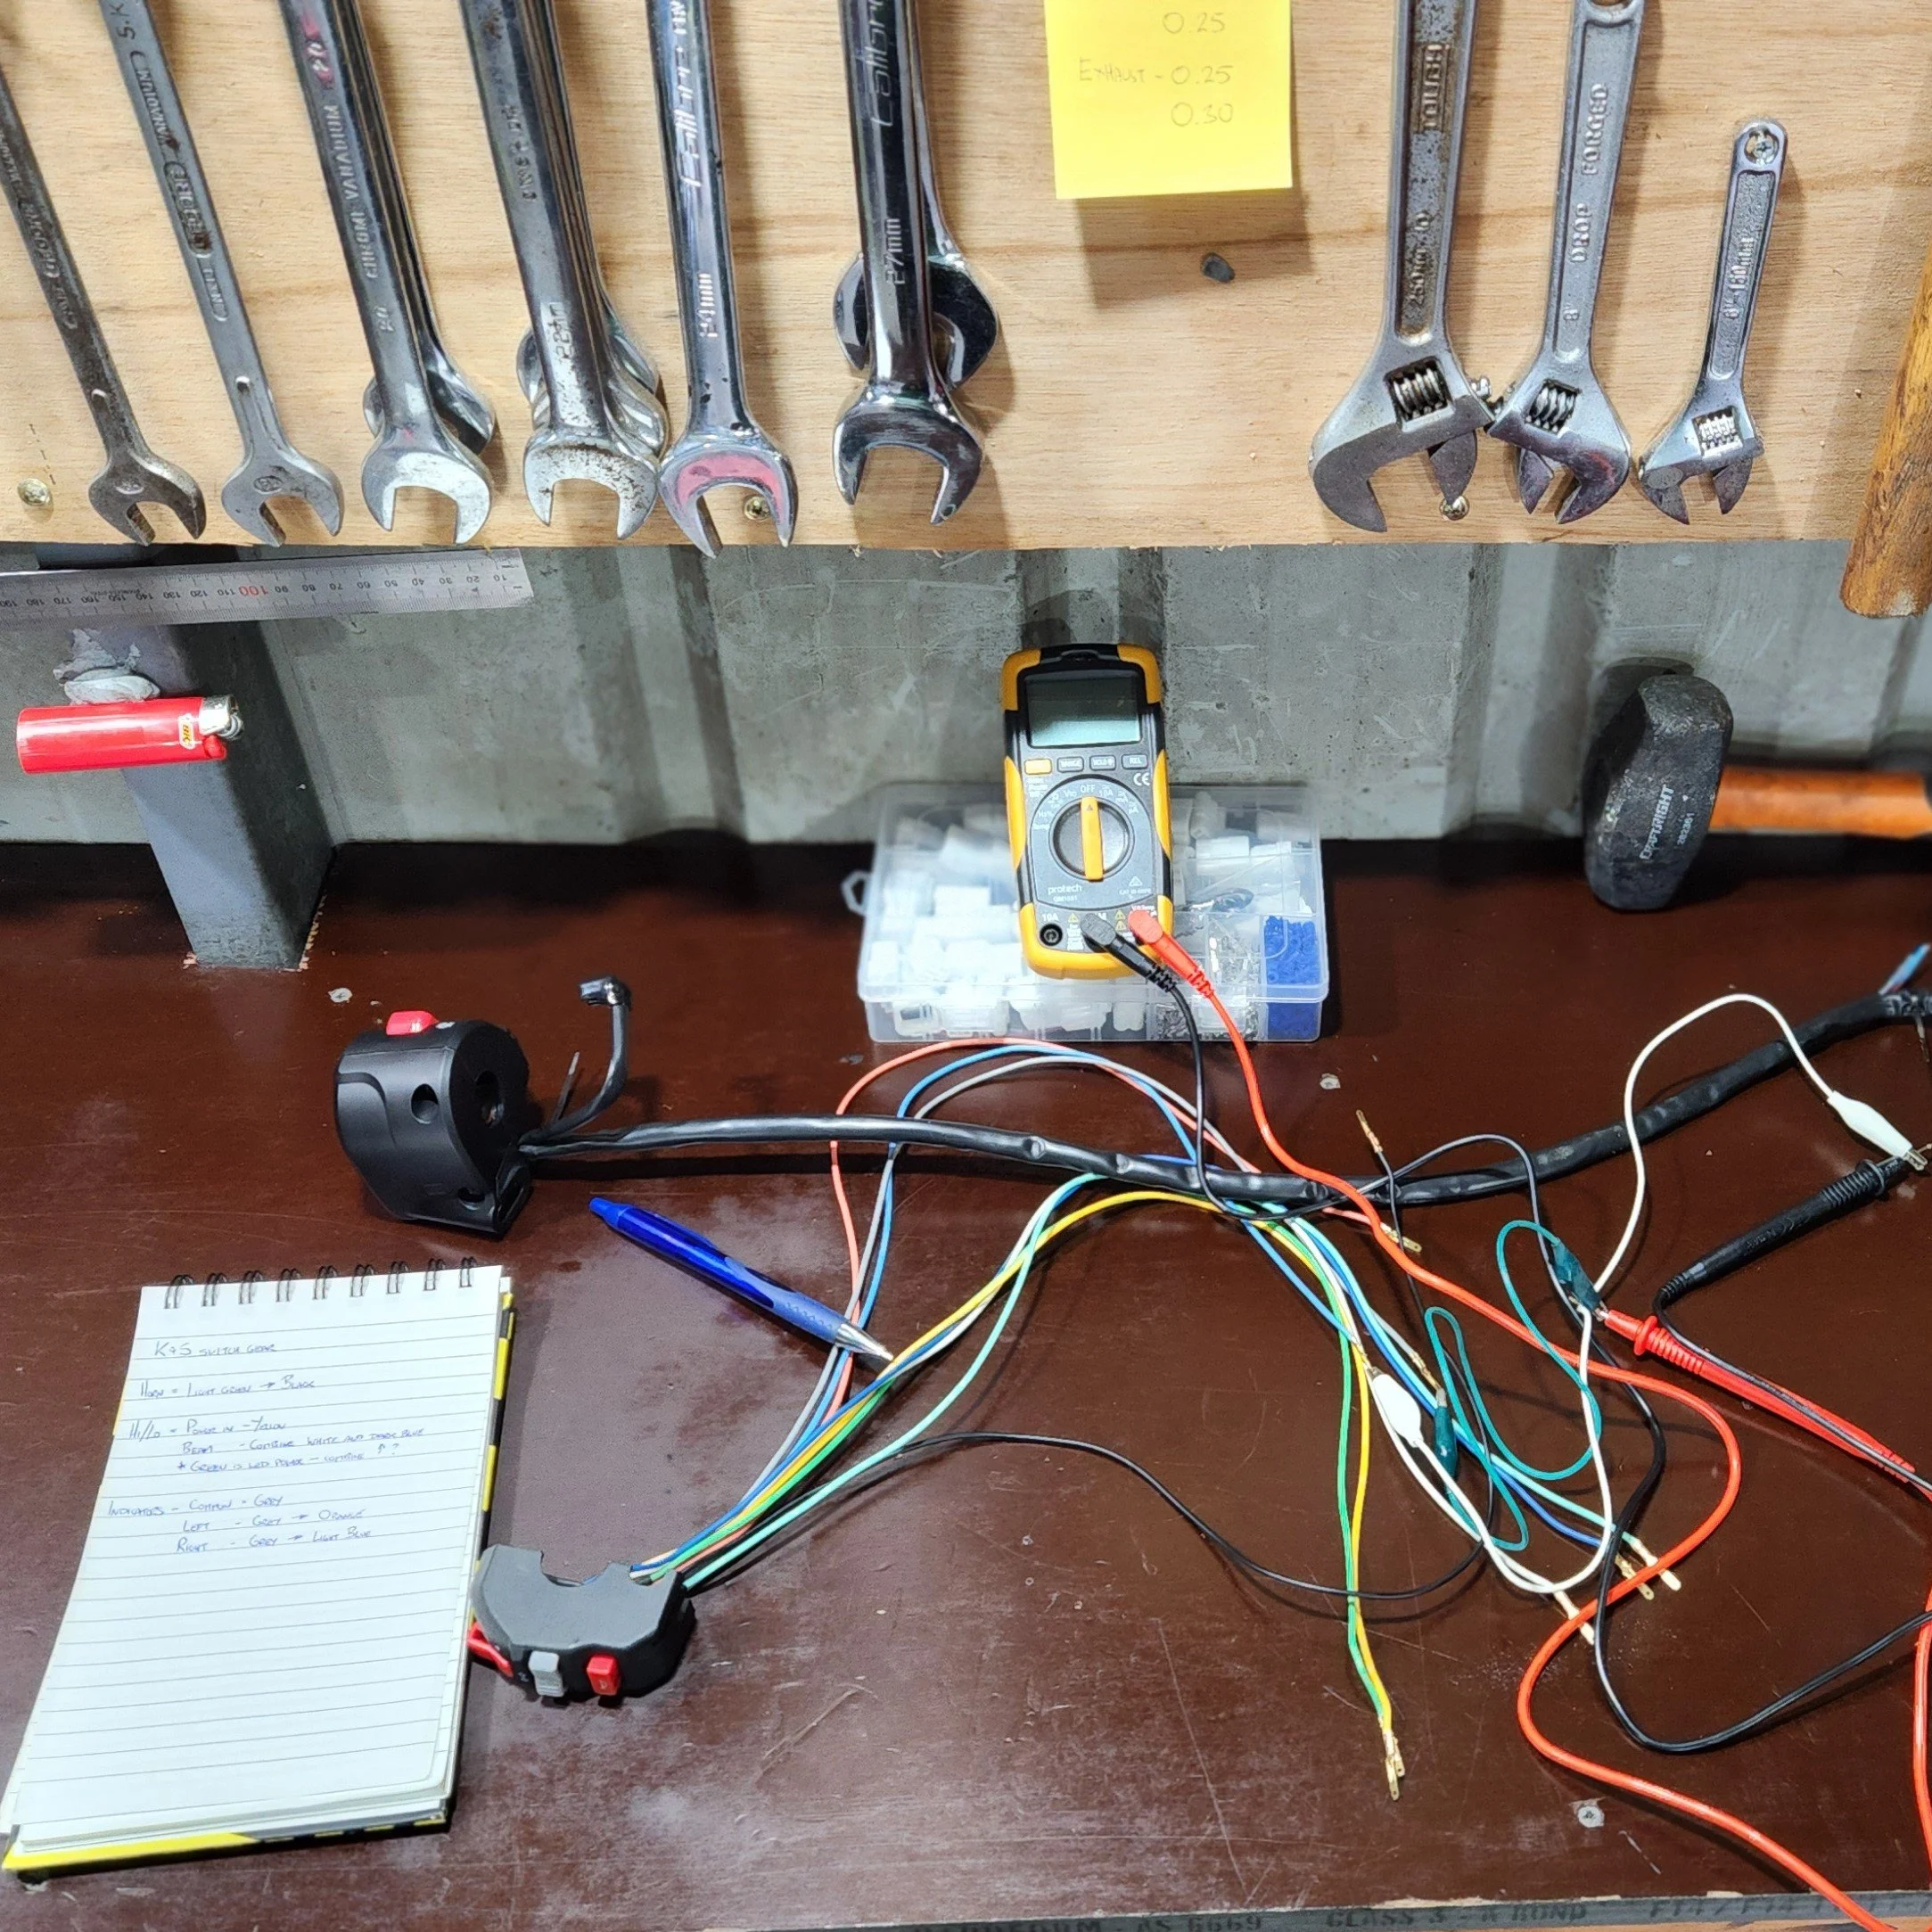
Plan and Prepare Before I touch anything, I like to understand the bike properly. That means reading wiring diagrams, learning the logic behind the switchgear, and checking everything with a multimeter. I’ve never had a factory diagram be wrong, but I still test every circuit before I start moving controls around. It gives me peace of mind.
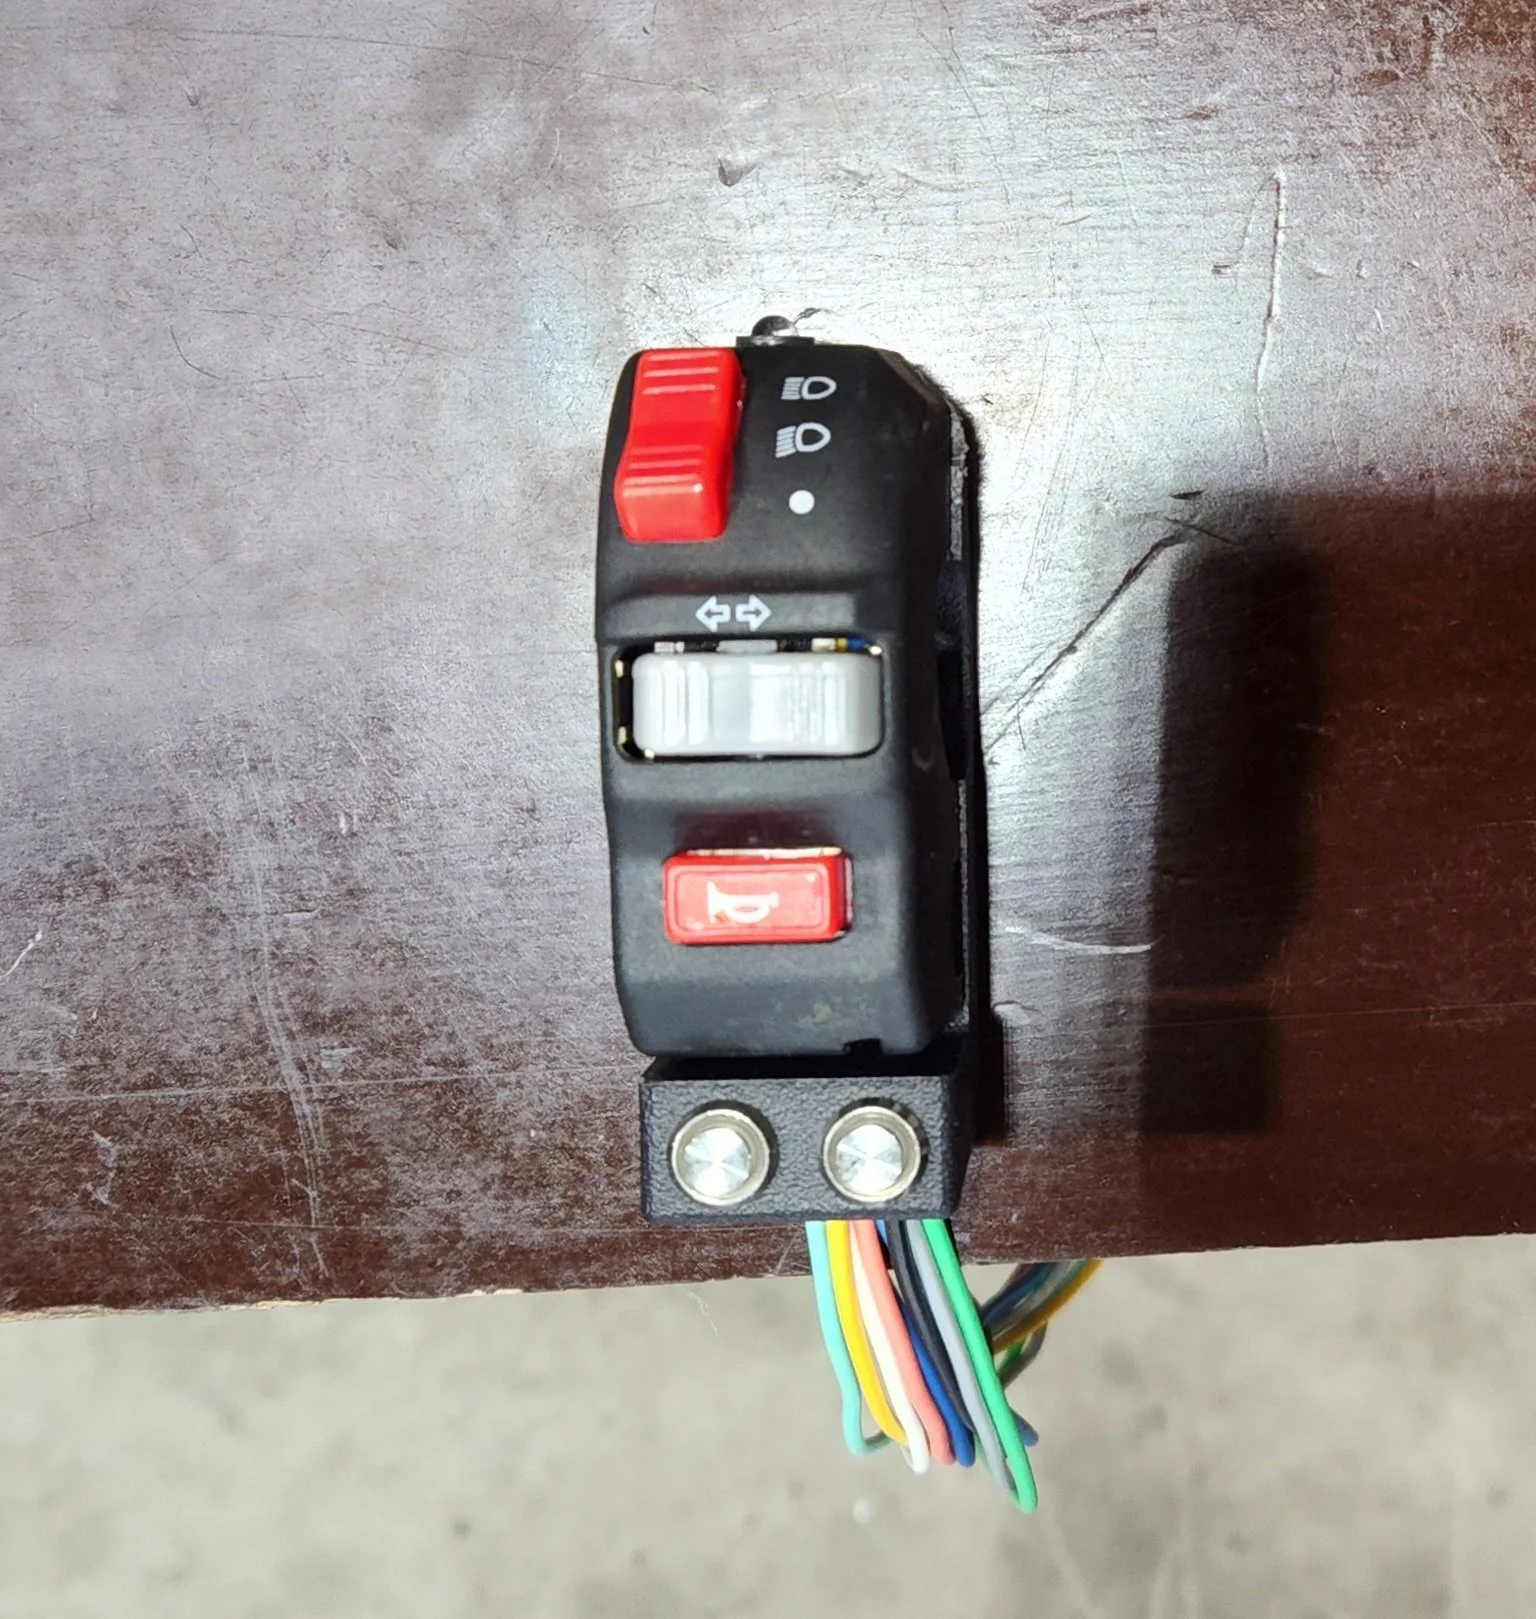
Over the years, I’ve tried a few different approaches to relocating switches: • modifying housings • using generic switchgear and adapting it • 3D‑printing custom housings • or, when possible, finding factory parts from other markets that do exactly what I need
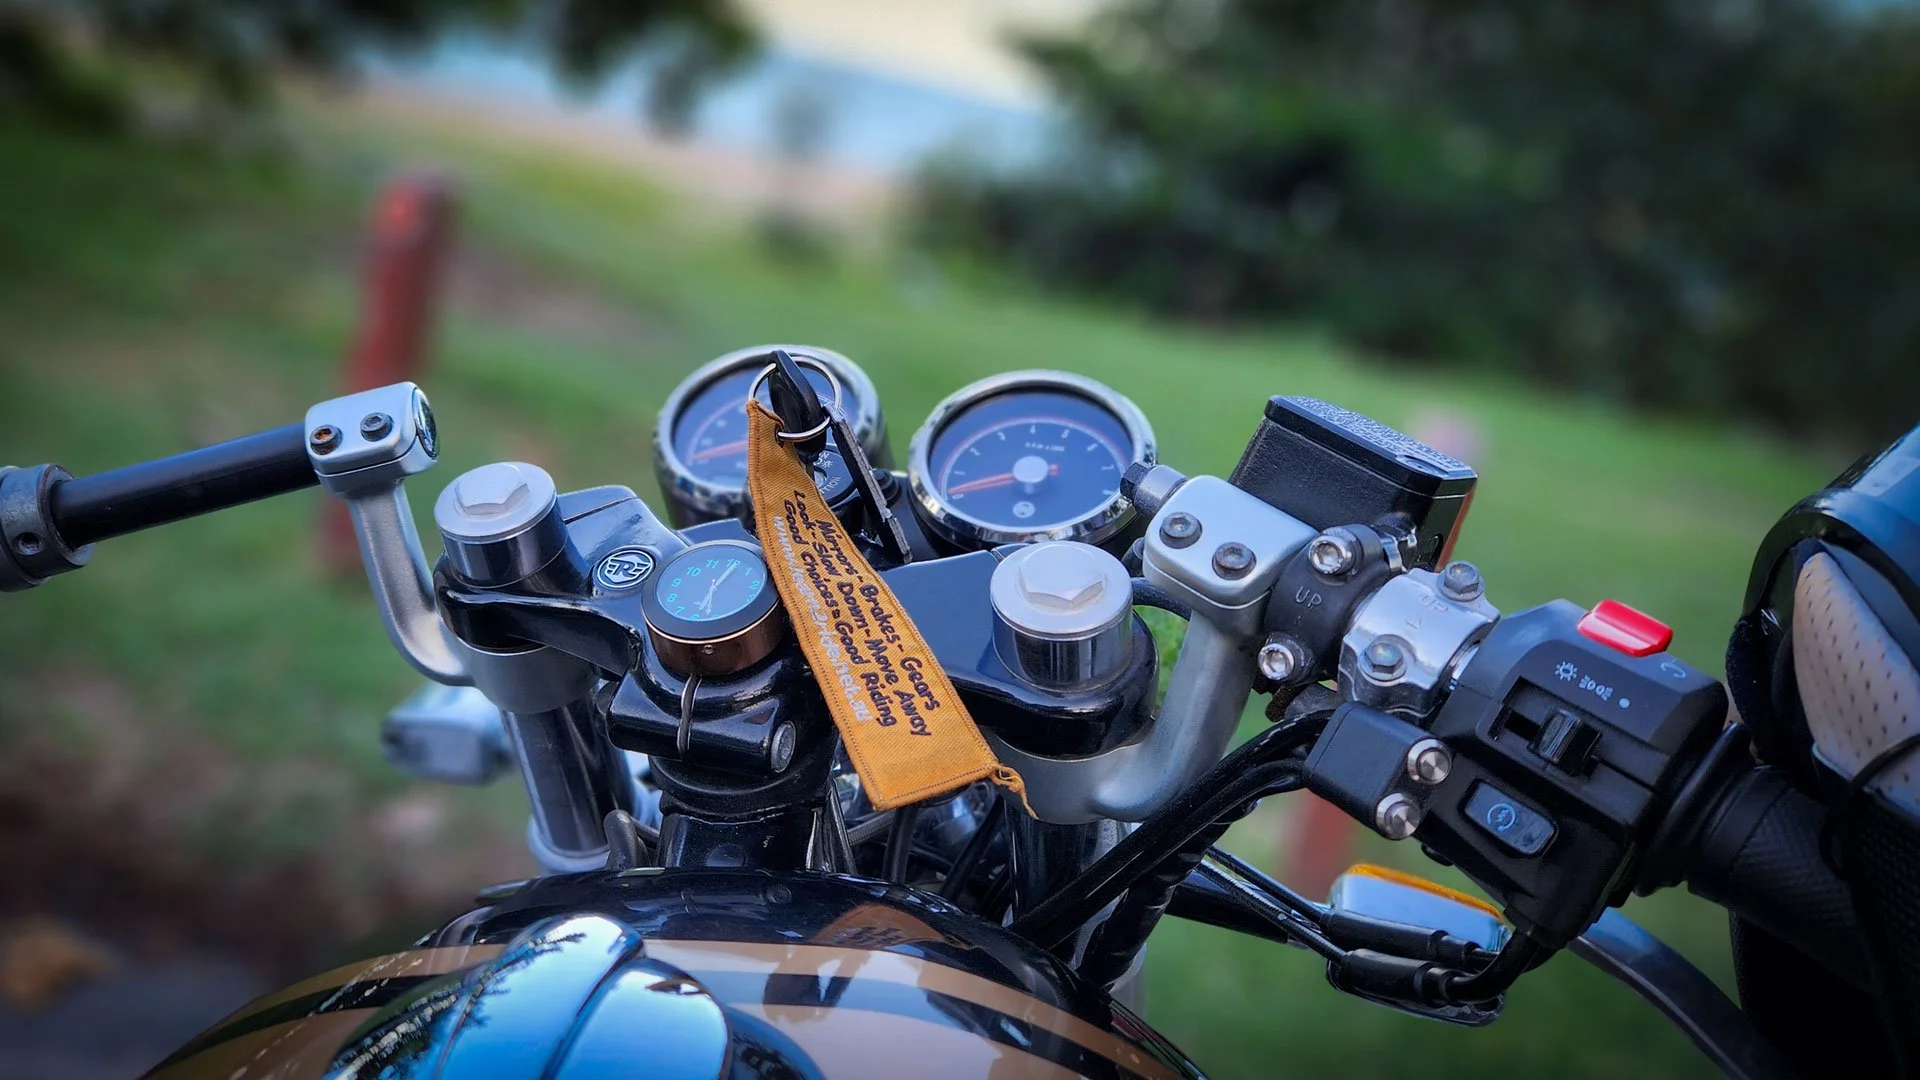
The Royal Enfield was a good example — in some markets, the right-hand switchgear includes a three‑position switch. I sourced that version, repurposed the switch for indicators, and added a small housing for the starter and kill switches. It kept everything tidy and still looked factory.
Sometimes I’ve had to make parts from scratch. Other times, I’ve found an off‑the‑shelf solution that works better than anything I could design. When I do 3D‑print housings, I use a tough resin, especially if the part includes labels or needs to survive weather.
I’ve experimented with longer handlebars to make everything fit, but I’d rather avoid that in the future. With the right parts and a bit of patience, I’ve found that most bikes can be set up cleanly without changing the bars.
Ergonomics matters a lot to me. I don’t want to take my eyes off the road to confirm a switch has been pressed, and I definitely don’t want to move my hand off the bars to reach anything. There’s always an adaptation phase, but if something feels distracting or awkward, I rethink the layout. I always test the setup while sitting on the bike before riding — and I always check that everything still works in the rain. I learned that one the hard way.
Plan and Prepare.
Before I touch anything, I like to understand the bike properly. That means reading wiring diagrams, learning the logic behind the switchgear, and checking everything with a multimeter. I’ve never had a factory diagram be wrong, but I still test every circuit before I start moving controls around. It gives me peace of mind.
Over the years, I’ve tried a few different approaches to relocating switches:
• modifying housings
• using generic switchgear and adapting it
• 3D‑printing custom housings
• or, when possible, finding factory parts from other markets that do exactly what I need
The Royal Enfield was a good example — in some markets, the right‑hand switchgear includes a three‑position switch. I sourced that version, repurposed the switch for indicators, and added a small housing for the starter and kill switches. It kept everything tidy and still looked factory.
Sometimes I’ve had to make parts from scratch. Other times, I’ve found an off‑the‑shelf solution that works better than anything I could design. When I do 3D‑print housings, I use a tough resin, especially if the part includes labels or needs to survive weather.
I’ve experimented with longer handlebars to make everything fit, but I’d rather avoid that in the future. With the right parts and a bit of patience, I’ve found that most bikes can be set up cleanly without changing the bars.
Ergonomics matter a lot to me. I don’t want to take my eyes off the road to confirm a switch has been pressed, and I definitely don’t want to move my hand off the bars to reach anything. There’s always an adaptation phase, but if something feels distracting or awkward, I rethink the layout. I always test the setup while sitting on the bike before riding — and I always check that everything still works in the rain. I learned that one the hard way.
What These Modifications Feel Like on the Road
Adapting to the changes I make on a bike has always been surprisingly straightforward. My brain tends to switch into a very matter‑of‑fact mode — “I don’t have a choice, so I’ll adapt.” The clutch relocation is the perfect example of that. Moving it to the right‑hand side felt natural almost immediately.
Where things get interesting is when I jump from one modified bike to another. Each bike has its own layout, its own switch positions, its own quirks. There’s always a small adjustment period while my muscle memory catches up, but nothing extreme or unsettling. It’s just part of the process.
I always test everything thoroughly in the shed before riding. If something feels even slightly distracting or awkward, I’m not above pulling it apart and starting again. The whole point of these modifications is to make the bike feel natural and predictable, not to create extra work for my brain while I’m riding.
Clutches.
When I first started this whole project, the most common suggestion I heard was, “Just get an automatic gearbox or an auto‑clutch.” That’s not how I like to ride, and more importantly, I didn’t want my future bike choices limited by needing a special clutch or gearbox. If someone enjoys auto clutches, great — I know another left‑arm amputee who swears by his EFM setup, and the guys at EFM were fantastic to talk to when I explored the idea. But for me, I prefer sticking with a standard clutch.
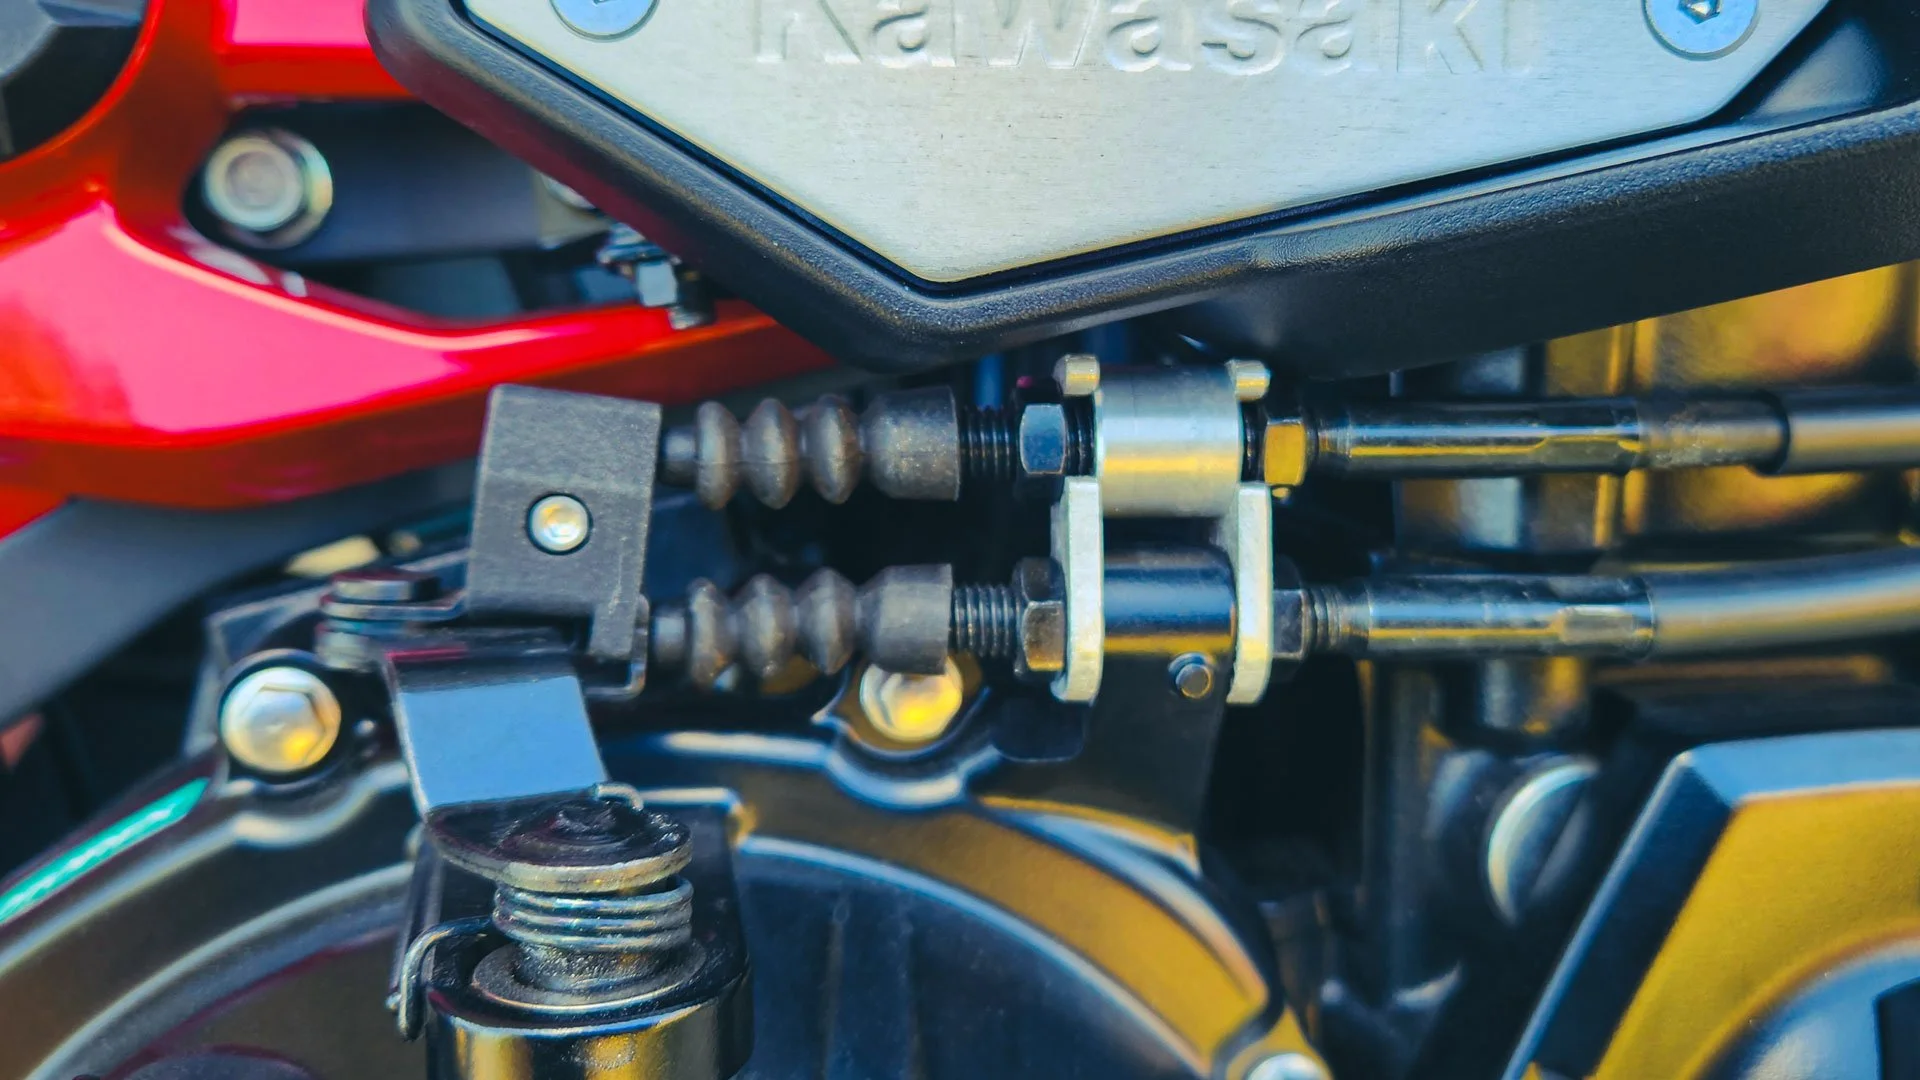
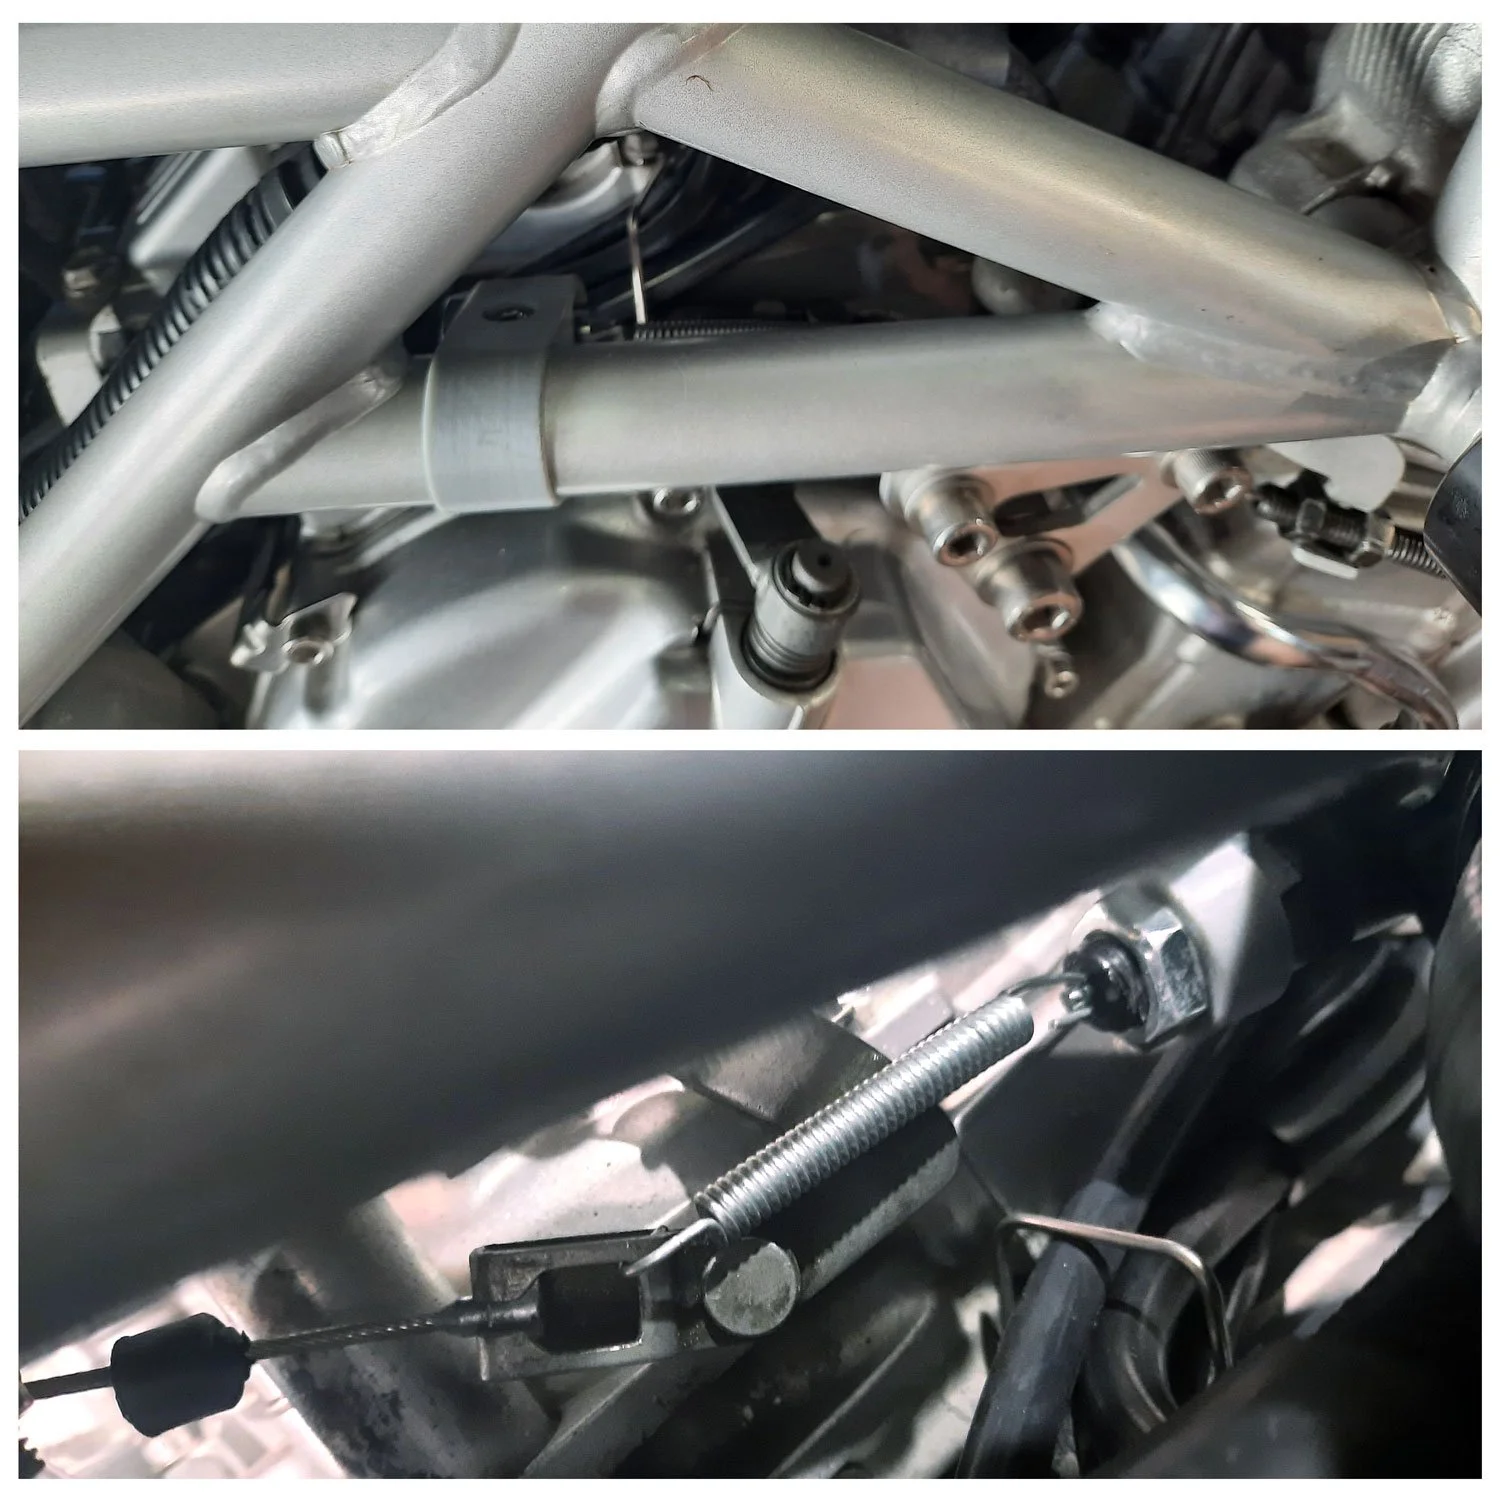
On my bikes, I run the factory clutch and either reroute the clutch cable or add a second cable, depending on what the bike needs. Keeping the clutch switch functional is important to me, so I’ve approached that in a couple of different ways over the years. One method has been using a generic rear brake light switch mounted to the frame and linked to the clutch arm at the engine. The other — and the one I’ve found simplest — is to keep the factory clutch lever, switch, and cable in place, then run a second cable from the right‑hand clutch lever down to the clutch arm. That gives me a “clutch” cable and a “switch” cable. I 3D‑printed a small clip to secure the switch cable at the engine end, and it’s been a tidy solution.
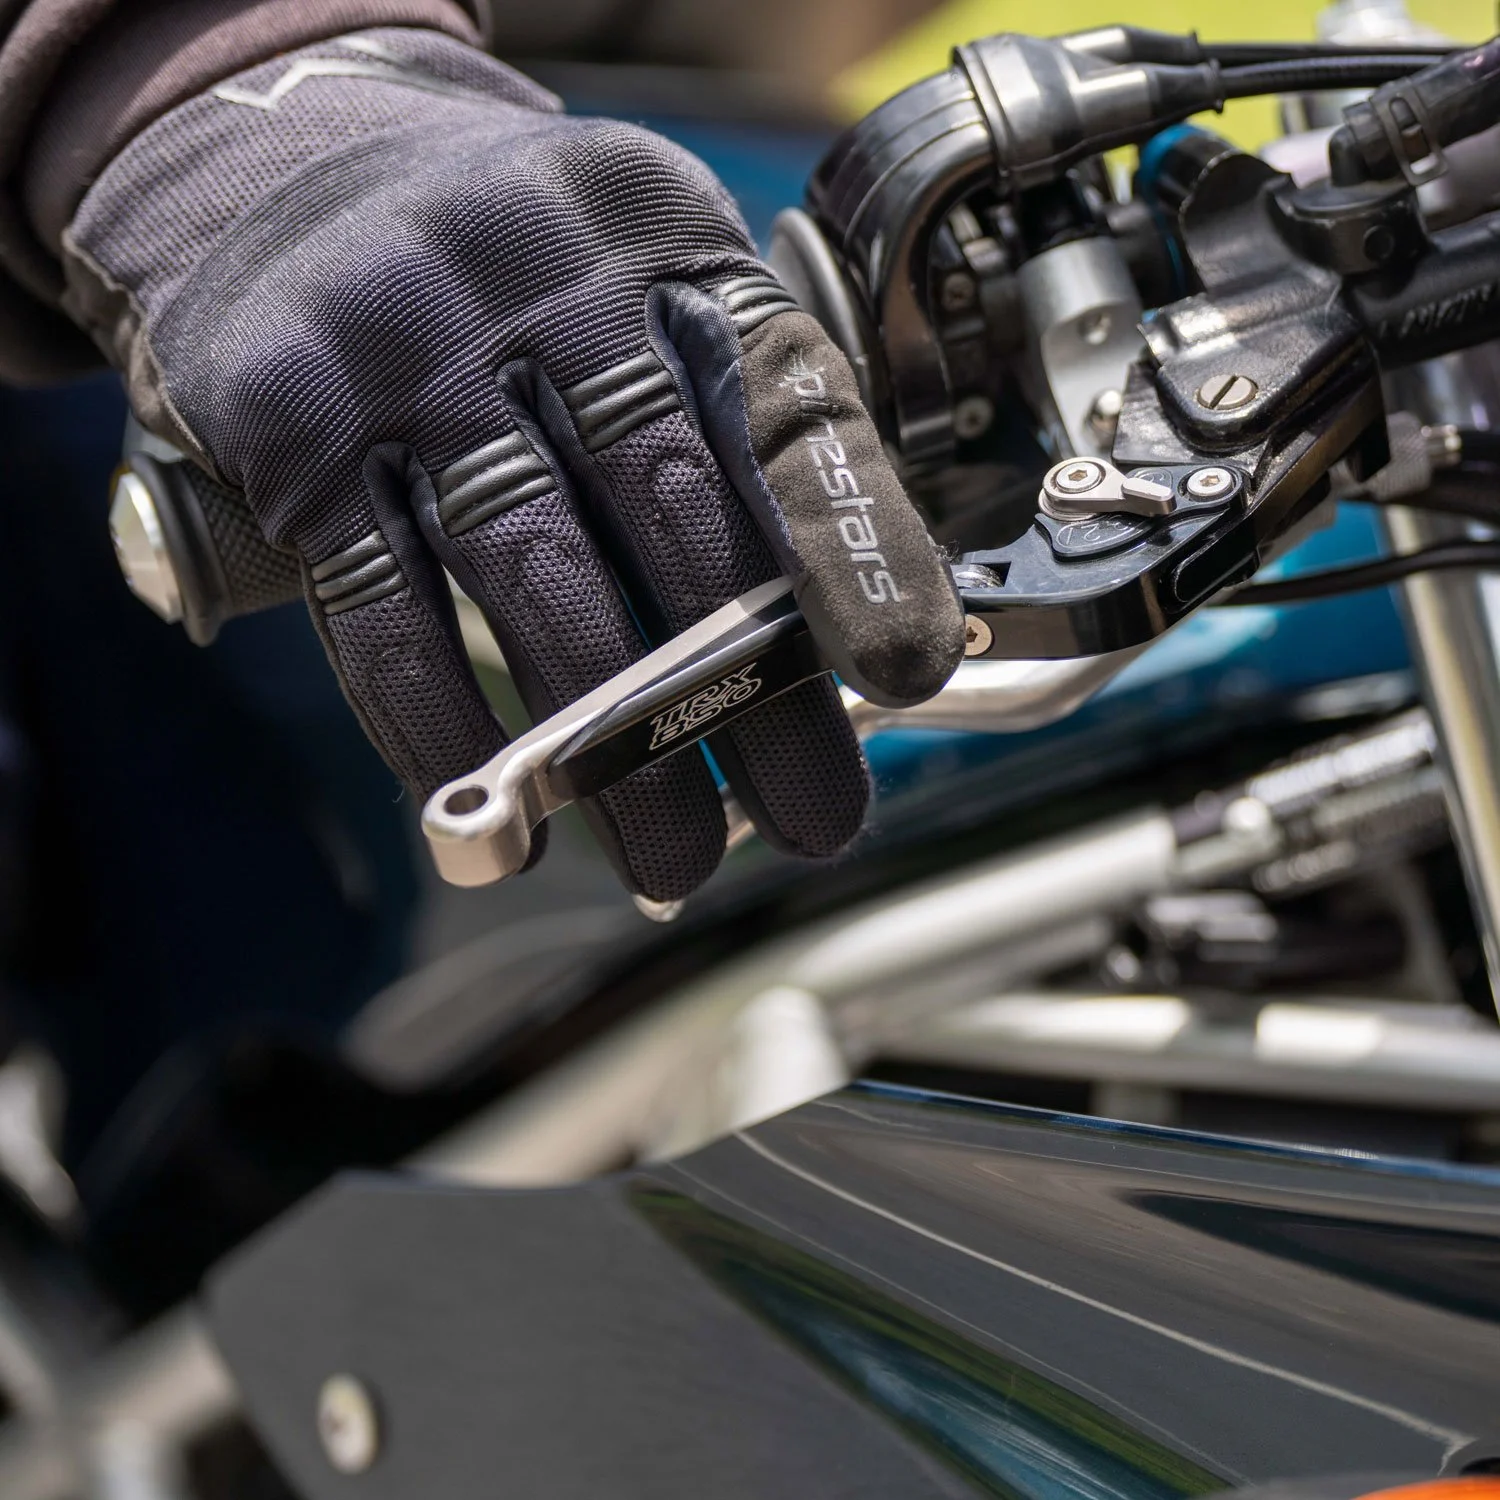
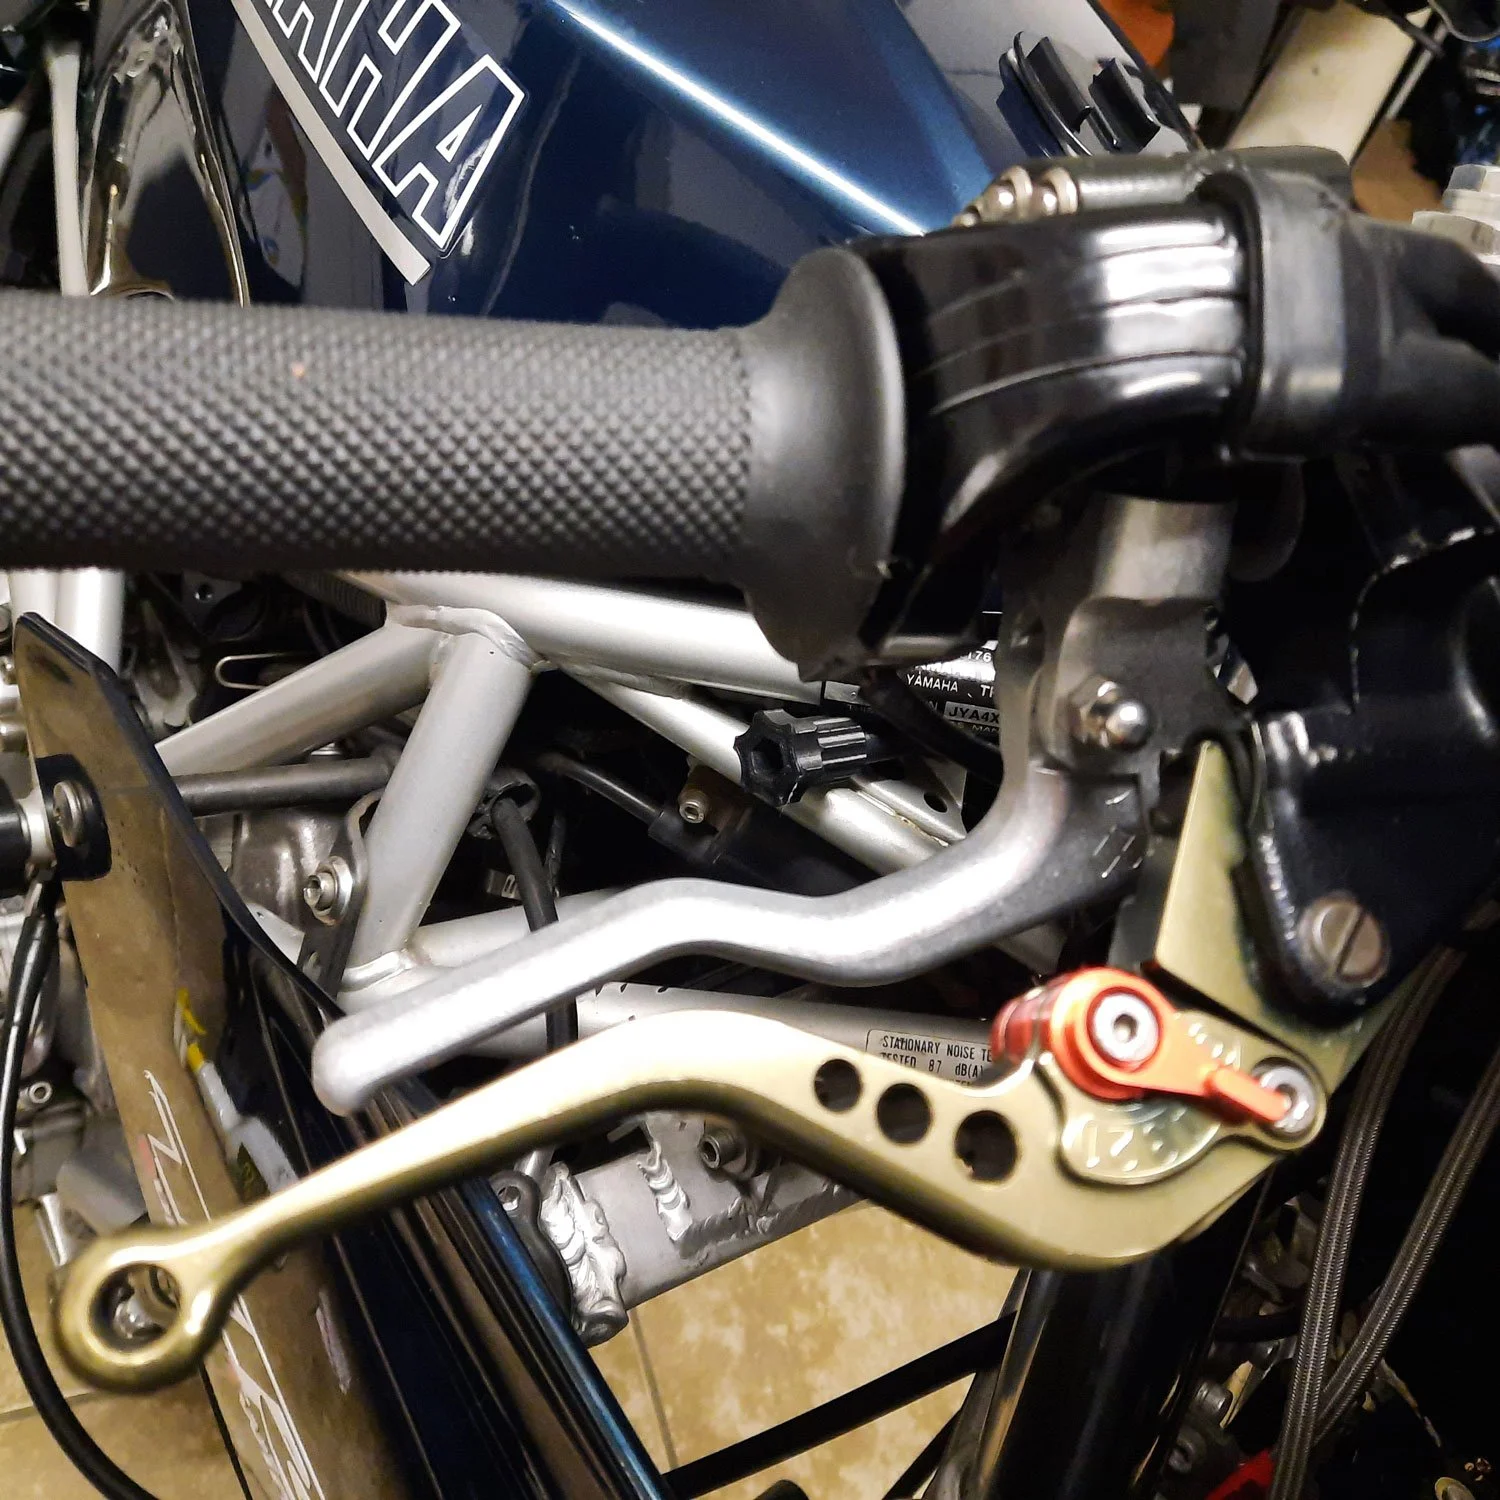
Clutch levers have been their own little journey. I’ve got a box full of levers and mounts from all the experimenting I’ve done. Short levers from Righteous Stunt Metal have been great when space is tight — the TRX needed one to clear the fairing — while the SWM, Royal Enfield, and Z900 all worked fine with generic full‑length levers like XR200/250 or DR400 types. The Royal Enfield even ended up using the SWM’s original lever, so sometimes the right part is already sitting in the shed. Most recently with the 2025 Z900, I found a lever that works pretty well, and may work well moving forward as it keeps the clutch cable running parallel with the handlebars.
I always spend time testing clutch feel before committing to a setup. Engagement, disengagement, lever travel — it all needs to feel natural for the way I ride. Once it does, the rest falls into place.
The bigger picture.
Every motorcycle I’ve adapted has taught me something different. The layouts change, the packaging challenges change, and the solutions that work beautifully on one bike might not translate to the next. But the overall approach stays the same: keep it factory, keep it simple, and make changes that feel natural and predictable on the road.
None of this is about reinventing the motorcycle or creating a universal method. It’s just the process I’ve followed to make my own bikes work for the way I ride. Some parts have been straightforward, others have taken a few attempts, and occasionally I’ve had to undo everything and start again. That’s all part of the learning curve.
What matters most to me is that the bike still feels like the bike — not a science project, not a compromise, but something I can trust and enjoy. Once the controls fall under my hand naturally and the layout stops demanding attention, the modifications disappear into the background and the riding becomes the focus again.
Below are some images showing how these ideas have come together across different bikes.