Let's talk about my setups and how they evolved.
The first bike mod I ever did was on the WR450 loaner bike I was given to test this whole “one arm, two wheels” thing on. Not the ideal bike for "testing", but I got there in the end. Anyway, the first mod was to relocate the clutch lever. This way I can at least ride the bike. For the test bike and any bike, really, this is all you need... unless you're going on the road. On the dirt bikes, there's plenty of room on the bars for the clutch lever relocation, and the rerouting of the clutch cable typically isn't an issue either.
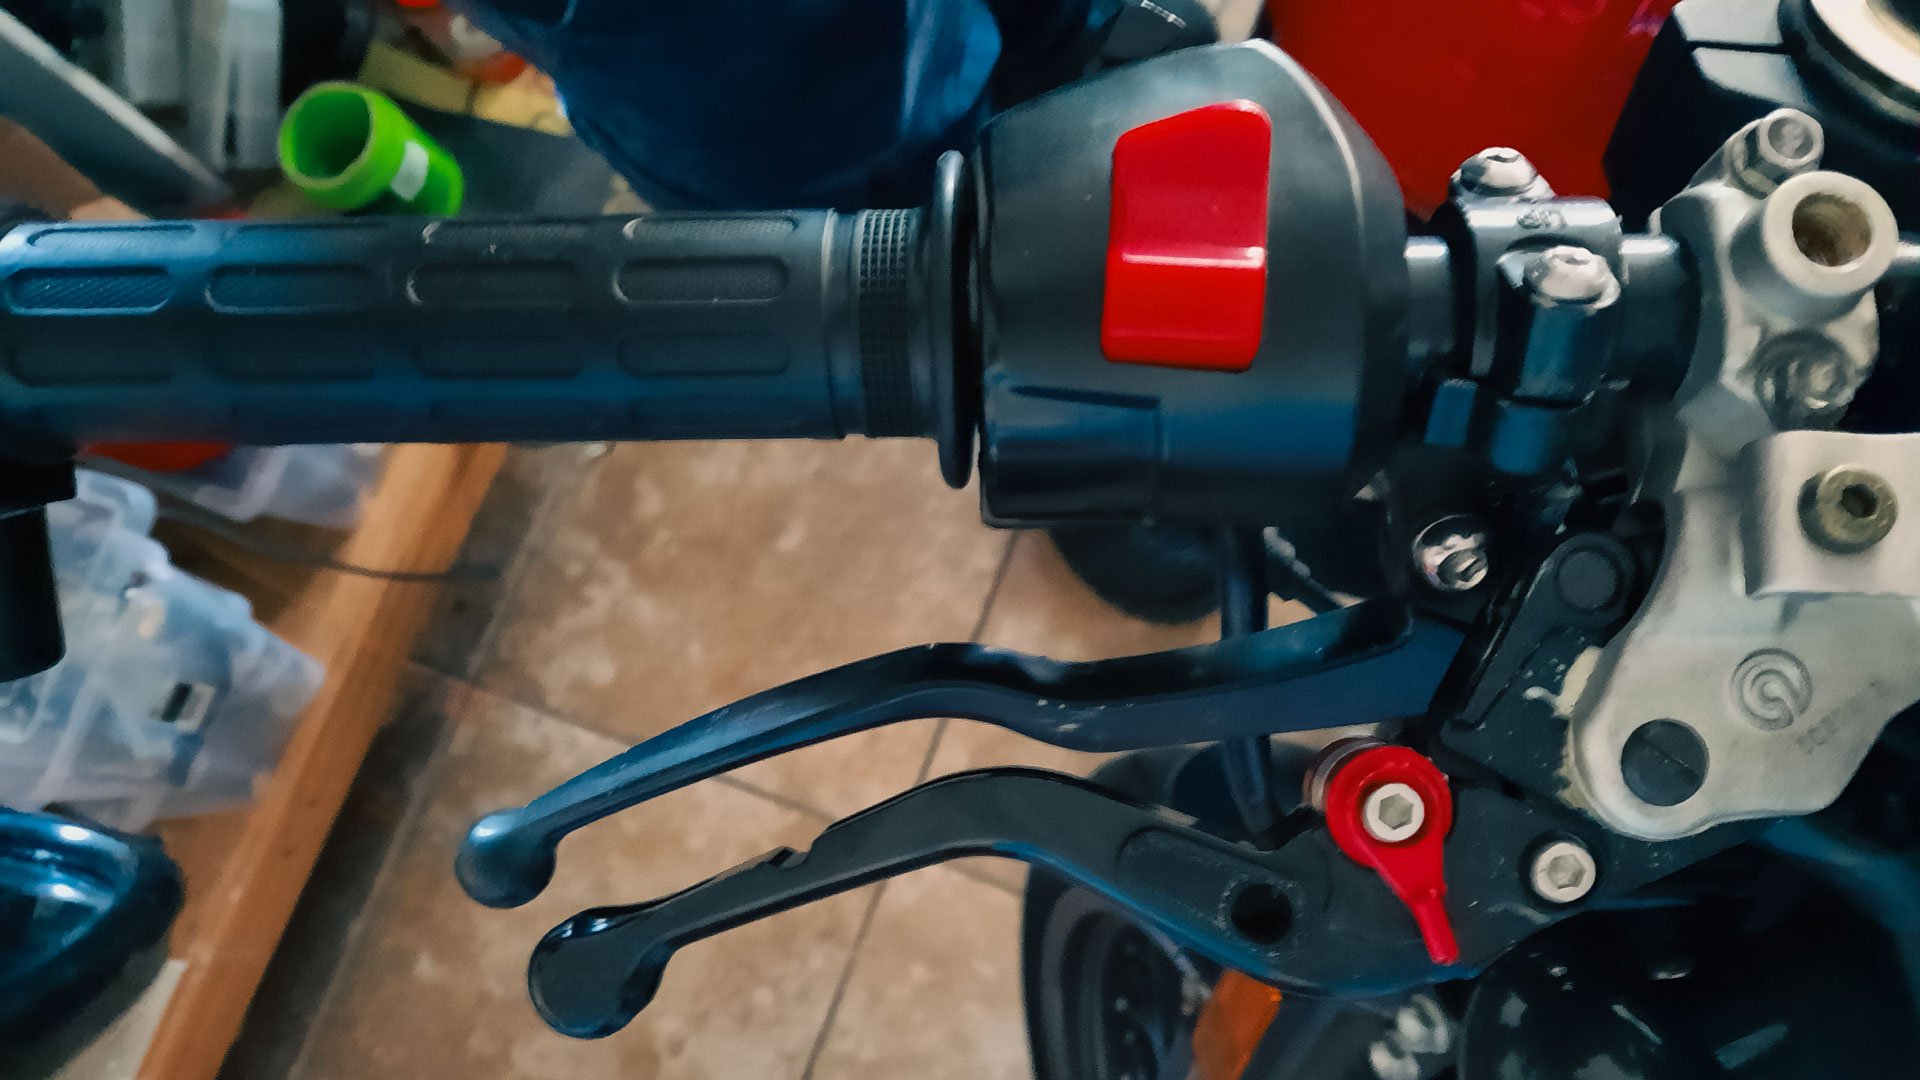
This was my approach in the early days, but now I'm a firm believer in leaving the factory clutch lever and cable attached in their factory positions. This saves you from relocating the clutch switch, makes the bars look neater, and, if the mirror mount is part of the clutch lever mount, saves you some headaches. Reattaching the factory clutch lever to act as either a "clutch switch only" cable or as a "second functional clutch lever" is a bit tricky. The latter is the trickiest and one I'm yet to master. My current Z900 has "two functional clutch levers", but the attaching part is only made of nylon and breaks after a few uses. I'm yet to fab one of aluminium or build a simpler mousetrap.
Simple is always best.
The SWM 440 was the test bed for all of the switching and wiring. I ended up using some generic eBay switchgear, with another generic eBay switchgear attached to the bottom of the first one. Along wth a modification to the first housing to accommodate the indicator switching. It was a fun experiment; I bought so many generic switchgear assemblies to test. Same with clutch levers and clutch lever mounts, I shelled out for a bunch of different ones along the way. Again, the clutch lever and its mounting are critical, as they eat into your handlebar real estate; it's a tight squeeze once you start stacking things where they don't normally belong. I did try wider handlebars for the SWM 440. But I went back to the standard bars after a while. Stock bars are the best bars.
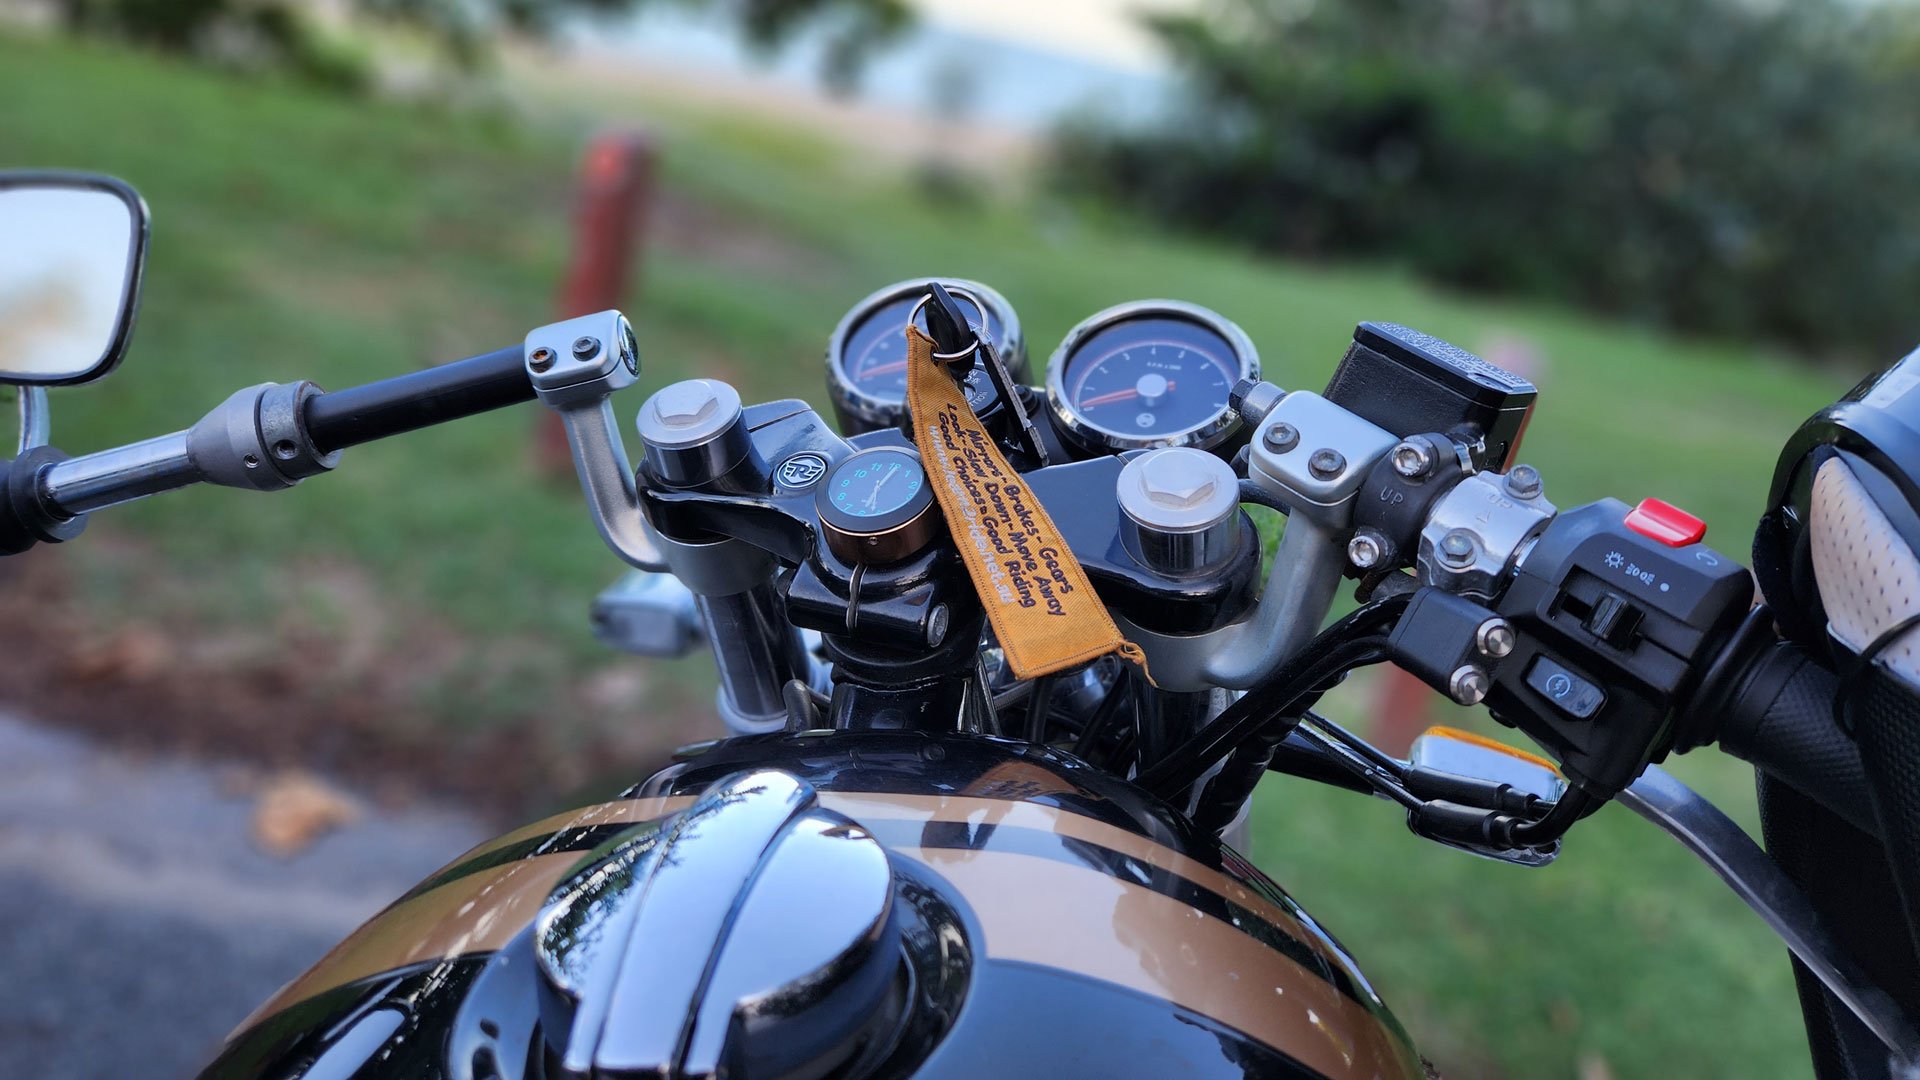
I think if I had to do the SWM 440 again, I’d use the same part I used on my Royal Enfield. For the Royal Enfield, I sourced an RH-side switchgear assembly for the Indian/overseas market. This switchgear had a headlight “on/off/high beam” switch that, with some soldering work, became my indicator switch. If then repurpose the standard kill switch to the headlight high/low beam switch, and the starter button becomes the horn button. Then it's a matter of making a housing for the starter and kill switches. Why repurpose switches that already have functions? Ergonomics. Indicators aside, I want to switch between high and low beam “naturally,” not have to hunt for a homemade switch when my eyes need to be on the road. Same with the horn button. Natural position. The starter and kill switches (kill switch is up for argument for some, I bet), but I have time to go looking for that (typically). Anyway, the Royal Enfield RH side switchgear is identical to the SWM 440 RH switchgear in every way other than electrically. You need to de-pin and reposition the pins on the Royal Enfield switchgear for it to function on the SWM. The other HUGE bonus with doing things this way is that you get to retain the factory throttle cables. I’m not a fan of swapping out factory throttle cables… in case I need to go hunting for the kill switch I moved.
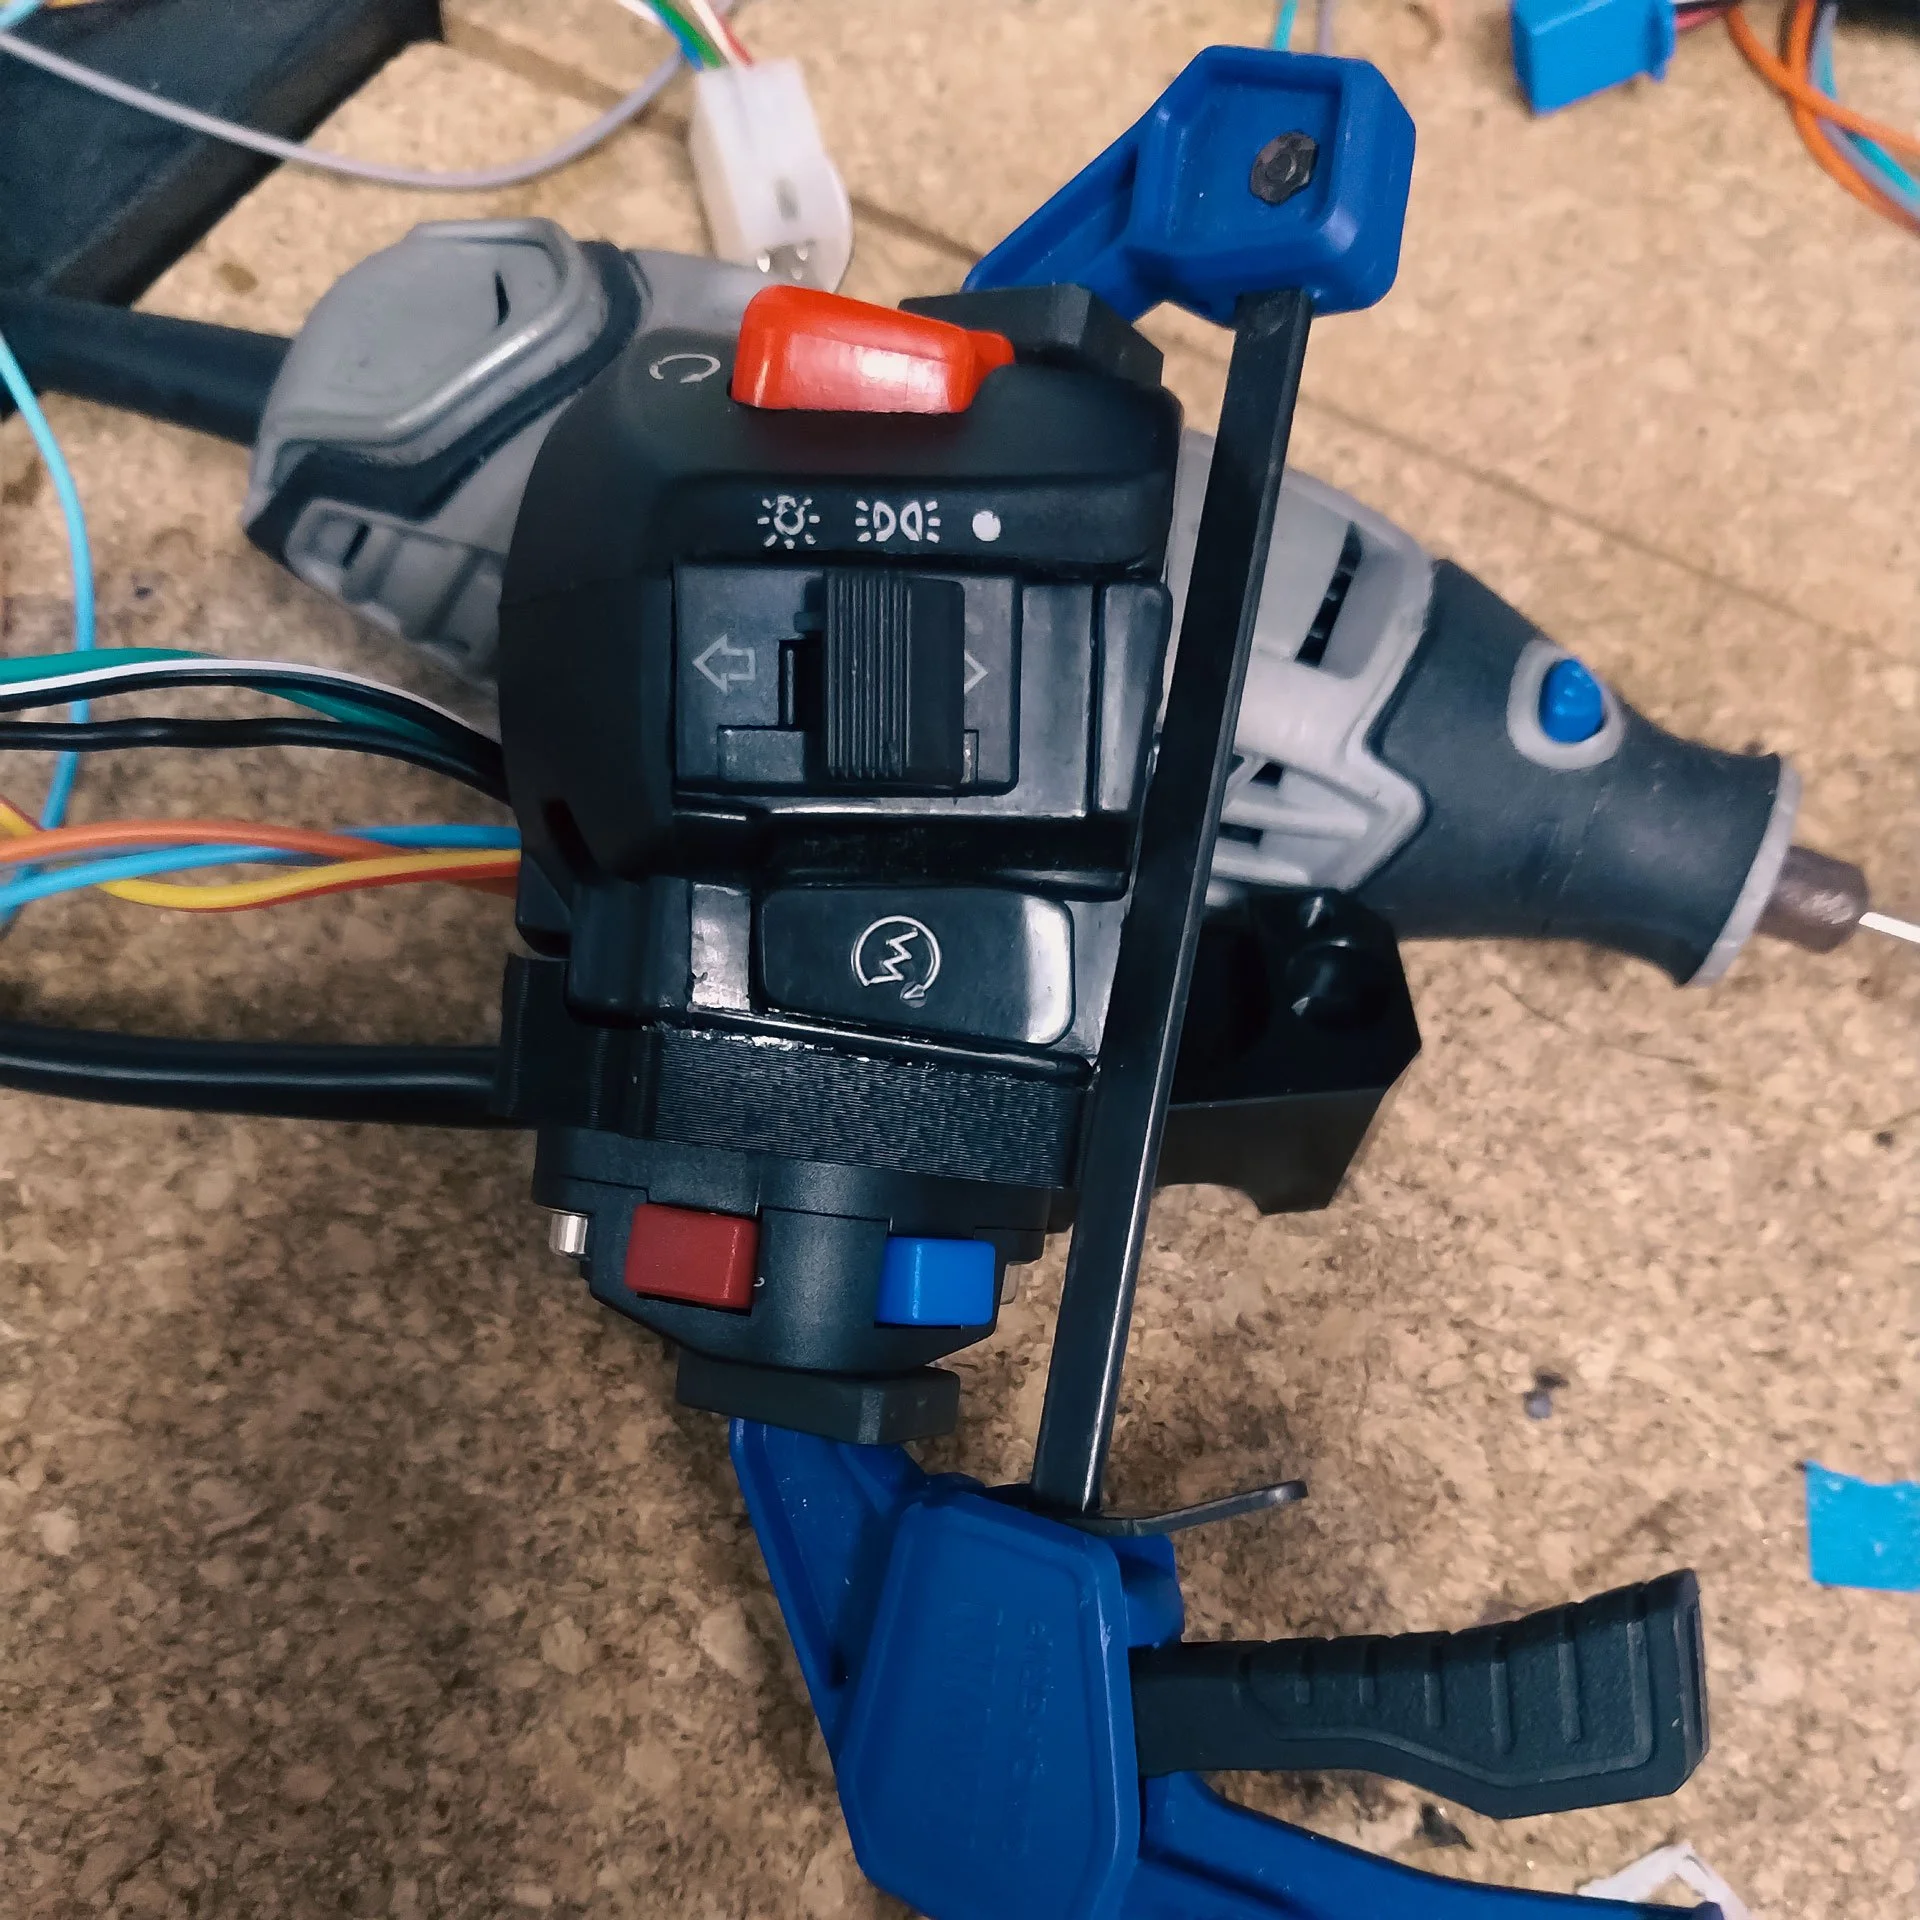
The Royal Enfield got the mods I mentioned above; funnily enough, I reused the SWM’s factory clutch lever on the RH side of the Royal Enfield. It was the better fit and function. It did take me two goes to come up with the best relocated starter and kill switch housing - it used 2 x 8mm switches (Aliexpress) and a 3D printed housing. Side note - there's a common complaint with the Royal Enfield 650s, they cut out and won't start intermittently. The only time my ever did that was when my cheap kill switch button failed. Other than that, the new switch is installed; my 650 never had that intermittent cutout issue. I believe the Royal Enfield 650s have a sketchy kill switch, and if I owned one and it was cutting out, I’d start by investigating the kill switch.
For those playing at home, there is NO room inside the headlight shell of the SWM for any additional wiring, very cramped in there, and a challenge to feed any additional wiring up into the shell. TheRoyal Enfield was a bit more accommodating. I never sorted the clutch switch on the Royal Enfield, though I just rode the bike without one. But if I had to do things again on another 650, I’d just keep the factory lever/cable/switch in place.
I used those same 8mm switches for both the TRX 850s in a custom housing. I’m about to put the Black TRX back on the road, and I’ll be ditching this “custom” housing in favour of a setup similar to what I have on the ZED. This custom housing was an attempt to overcome the complete lack of real estate on the stock TRX handlebars. It worked, but it's not very ergonomic for the high- and low-beam or horn switches… I got used to the horn switch, but the high/low would always trip me up. Fortunately, the stock headlight on a TRX isn't that great even on high beam. As I mentioned, I’m redoing the TRX switchgear and clutch setup - I want the TRX to be the first motorcycle I do that can be operated by a rider with one arm or a rider with two arms. The current clutch switch mod for the two TRXs used a generic rear brake light switch and a custom 3D-printed bracket to mount it.
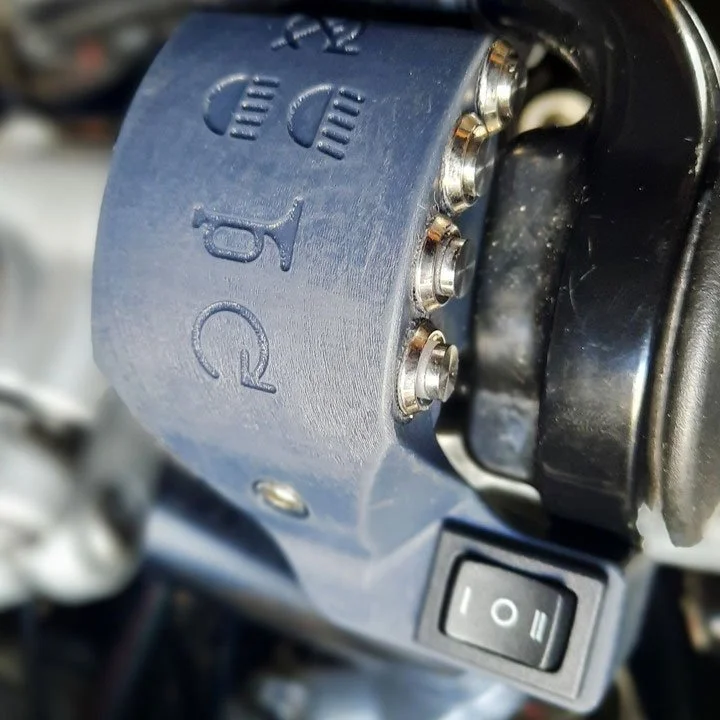
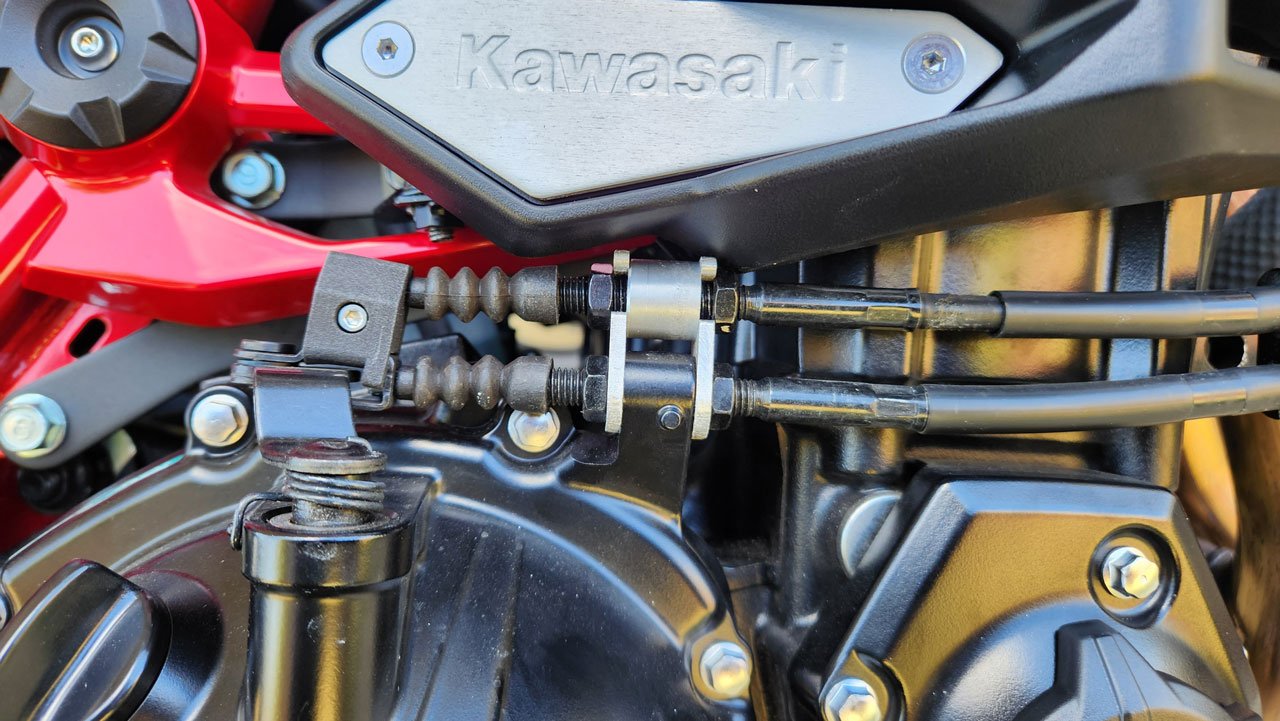
The First Z900- this is the bike where “keeping things factory” really kicked in. It was the first “clutch switch cable” bike; two clutch cables, one connected to the engine's clutch arm, the other tethered to that cable to activate the clutch switch. The switchgear was a K&S switchgear, which was pretty nice other than the high/low beam not functioning in extreme rain - in the wet, that bike was high beam all the time, until it dried out. I used the same 8mm switches, again in a custom 3D-printed housing. On the first Zed, but I got a bad batch, and they were nothing but trouble - and when the kill switch wigs out on your Zed, you get error codes. The first Zed also required a custom-made front brake light switch because of the clutch lever's position relative to the front brake lever. Previously, I’ve used hydraulic front brake light switches - both the TRXs use hydraulic brake light switches.

The second, and current Zed, is the standard I’d like to maintain - the switching is still generic gear, but it's so far been extremely reliable in all sorts of weather. The ergonomics take getting used to; the indicator switches are latching, so you've got to dance a bit with your thumb, or you’re going to confuse other road users. I’ve gotten used to that and the “best I could do” positioning of that switchgear. You see, the second Zed is “fly by wire”, and I am NOT going to mess with that housing. So, I kept everything throttle (and start/kill switch) where they are, and simply 3D printed a mounting plate to attach the switchgear. No need for a custom-made front brake light switch on the new Zed this time - plenty of room there. I’m using a different clutch lever on the Zed, and I feel like this part might be my standard part, as it pushed the clutch cable position (relative to the bars) out further than most generic levers I’ve used before.
I use lever spacers to push the levers out away from the bars. On the Royal Enfield, I used an 8mm spacer on the front brake lever only. For the two TRX’s, I used the same spacer, and I believe I’m running a Righteous Stunt Metal clutch lever on one TRX (great lever). The current Zed uses a 12mm lever spacer on the clutch lever and an 8mm spacer on the front brake lever. This works for me, but may not work for others. And, my ride instructors are going to get mad - I only use two fingers on the brakes. My other two fingers are working the clutch. I do, however, practice four-finger emergency stops - I just let the bike stall out at the end.
Generic clutch levers have very generic quality - they wear out. I’ve found the Righteous Stunt Metal levers are great, or the chunk boi clutch lever I found on AliExpress - I’m using this on my current Z900, and it's been great. The clutch spacers are sourced from Righteous Stunt Metal, or I’ve 3D printed the taller ones from Aluminium.

Tools. Get the right tools: strippers, crimps, connection tools, etc. And, get a wiring diagram, then spend a day or two looking it over, then pretend it's completely wrong and TEST EVERYTHING with a good multimeter. I can't remember which bike it was, but the wiring diagram gave me wrong wire colouring - something to look out for and test for. In all my messing around with the electrics on all of these bikes, I never nuked a fuse, ECU, battery or melted wires. Having said that, keep some spare fuses and keep something to put a fire out with when you’re messing with this stuff. I find out what the factory connections are as well BEFORE I start pulling the bike apart. I started doing this after I didn't do it on the first Zed. Sets your project back a few weeks if you’re not properly prepared. Another cool thing, or a nice thing - my preferred thing, is to source wire colours that match the factory harness. I got most of my colour-matched wiring from the generic eBay switchgear assemblies I bought. I build an intermediate harness now - a separate, small wiring harness that connects the switchgear I intend to use at one end, and the two other ends of the intermediate harness connect the factory LH switchgear and the main wiring harness. Dont cut, hack into, or modify factory wiring. When you use the same connectors as the factory harness, the work is pretty simple.
Ergonomics are SUPER important, and it took me a fair few goes to understand that. This is the switch position, switch actions and the mechanics of the switch itself. All contribute to a smooth riding experience. You dont want to be hunting for switches while riding, so position is the first priority. You dont want to fight a switch, both in its action (press/pul/slide/rotate) and its action (start, kill, horn, indicators, etc.) - choose the right switch for each function. I have found you dont get a perfect world situation; there’s always been a trade-off. Be it a heavy switch or “just not quite right” switch position, there’s still some adapting required. At least until I start making my own entirely bespoke switches and switch housings.
That's what I have from the bikes I’ve done so far. I’ll update or do another post once I have the TRX sorted - this will be the first “one arm or two” modification I do, and hopefully it will be the default with every bike I modify in the future.